

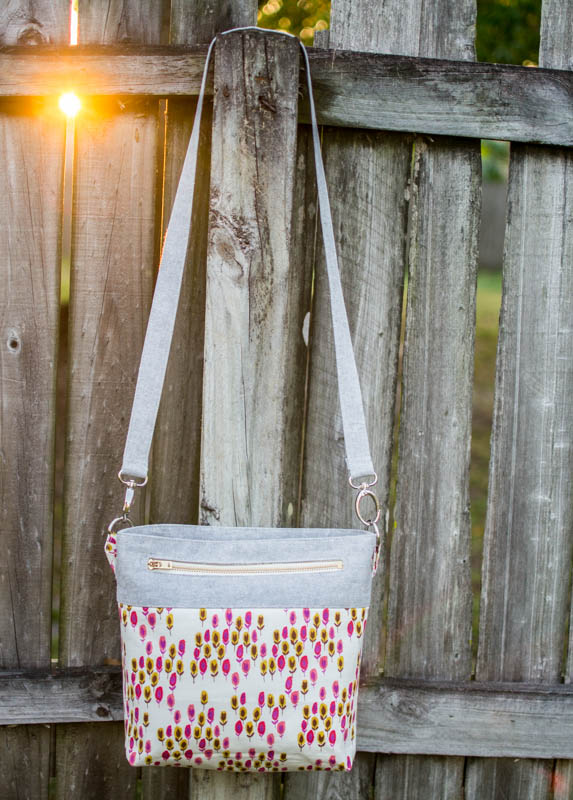
I'm so excited about this bag... it's my new favorite purse!
UPDATE: This blog post has been converted to an optional PDF thats optimized for printing. Find it here.
{Hey! This free pattern is included in my Ultimate List of Fast and Easy Tote Bags to Sew. Check it out.}

The original sewing project was for a cross body tote only, but I usually carry my bags over one shoulder, so I made the strap convertible. I love the double- strap look! You don't have to use clips like this or make the strap convertible... I'll explain how to sew it both ways.

There is an exterior zipper pocket, interior slip pockets, and a little interior d-ring for clipping your keys or anything else on to. Plus a magnetic snap. All of these features may be included in your tote or left off depending on your preference.
You could also very easily put the zipper pocket on the inside or the slip pockets on the outside. See how easy it will be to personalize your newest tote!
Are you ready to sew a Convertible Cross Body Tote??? Here we go!
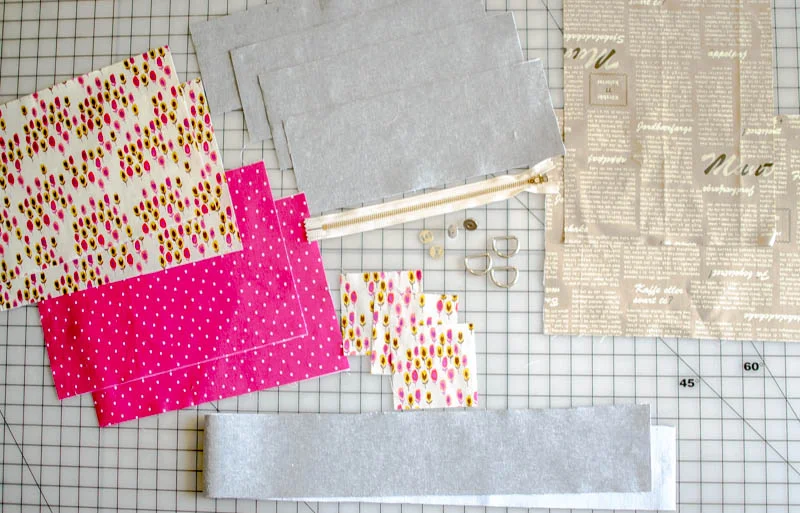
You will need:
1 fat quarter (18'' x 20'' piece of fabric) for the exterior and tabs
1 fat quarter (18'' x 20'' piece of fabric) for the interior lining
1 fat quarter (18'' x 20'' piece of fabric) for the pockets
1/4 yard of Essex Linen (or other fabric for the top panels and straps
1 yard of interfacing or fusible fleece (I used Pellon SF101 Shape-flex)
1 zipper, 8'' or longer
1 magnetic snap
3 D-rings (2 for the shoulder strap, 1 for interior ring to clip things on)
1 or 2 swivel snap clips (for a convertible strap)
Cutting:
All measurements are height x width.
From the fabric for the exterior, cut:
2 rectangles 9'' x 13'' *
3 squares 4'' x 4''
From the lining fabric, cut:
2 rectangles 9'' x 13'' *
From the Essex Linen or coordinating fabric for the bag exterior and straps, cut:
4 rectangles 4'' x 13'' (top panels)*
1 strip 4'' x fabric width (or 42'' - strap)*
From the pocket fabric, cut:
1 rectangle 11'' x 13'' (interior slip pocket)*
1 rectangle 14'' x 10'' (exterior zipper pocket)
NOTE: you will soon notice that the upper panels are a little bit taller in the how-to pictures than on my finished tote. At the last minute before sewing the bag together, I decided to chop an inch off the top of the bag - and I liked the new look so much better. That made the zipper not centered top to bottom on my upper panel so I'll tell you how to get my look and how to center it. But other than that, just follow my sewing instructions to get a fantastic tote!
Interfacing:
Apply interfacing to all of the pieces that have asterisks above: the exterior and lining print fabrics, the slip pocket, all 4 coordinating top panels, and the strap piece. If you are using fusible fleece, do not apply it to the slip pocket piece.

Sew the bag sides (inside and out):
To make boxed corners, measure and cut 1 1/2'' squares from the bottom corners of the exterior and interior rectangles (not the upper panels).
Skip this step if you don't want boxed corners.
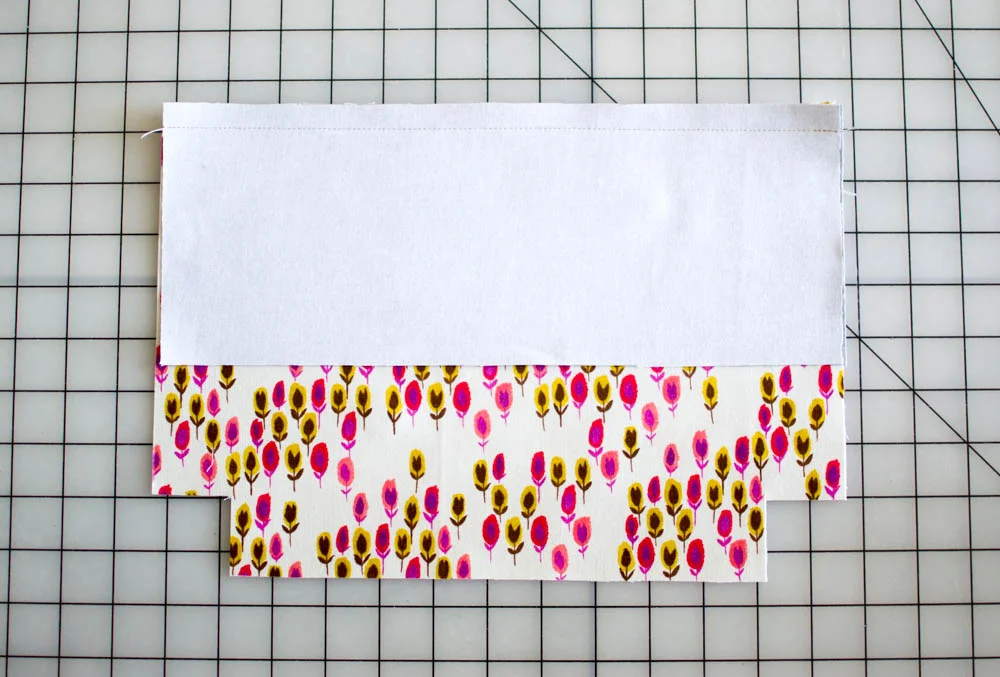
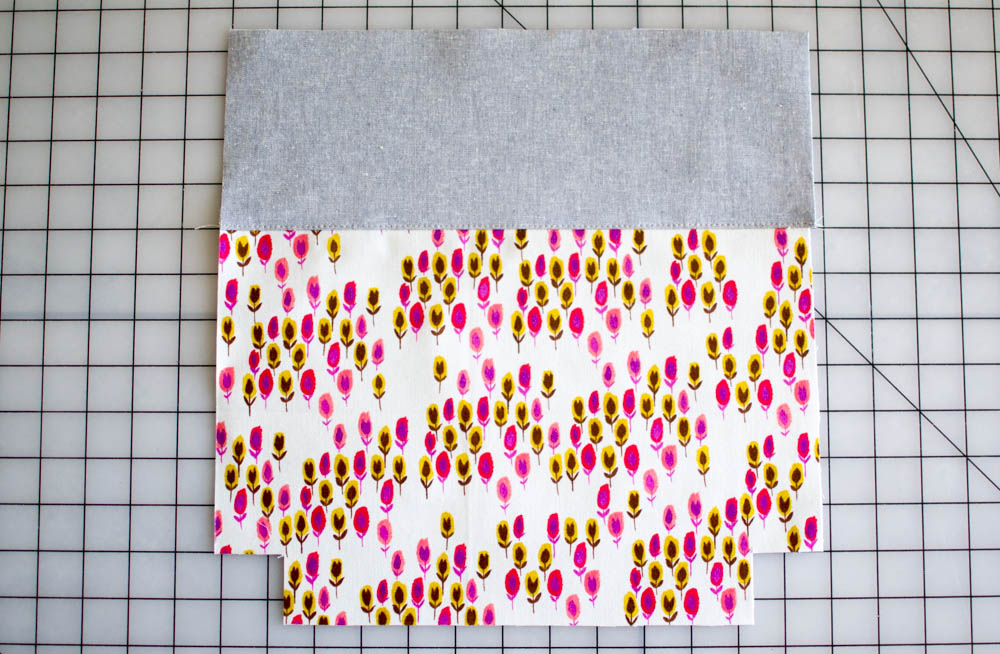
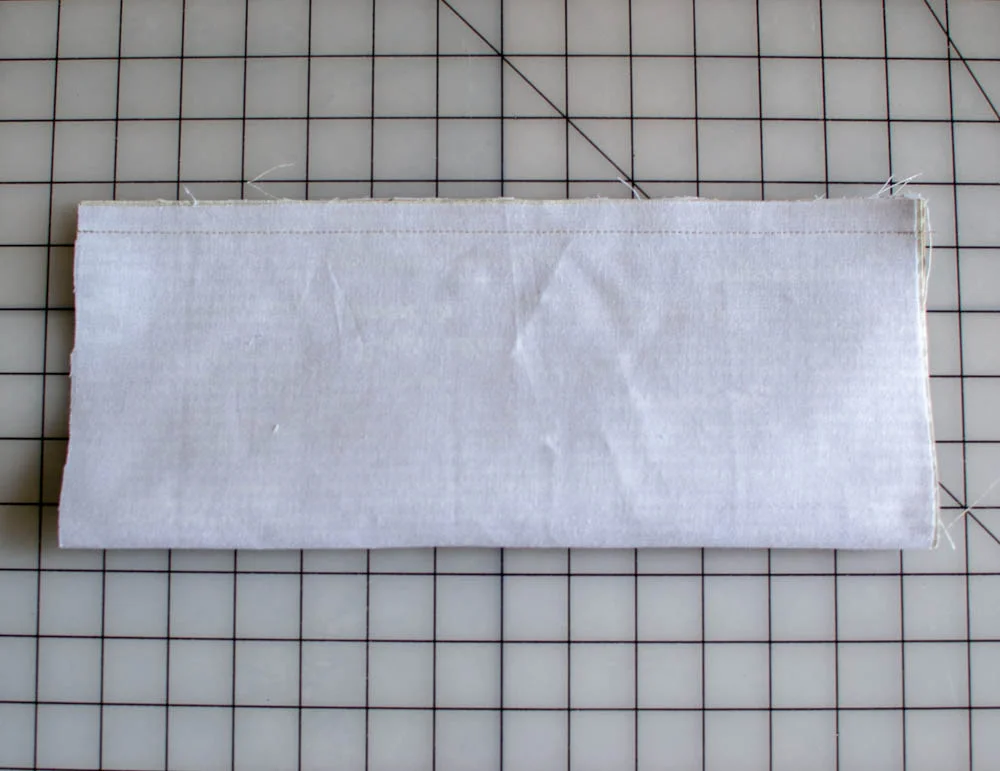
Sew a top panel piece to each of the 4 interior and exterior rectangles with a 1/2'' seam allowance.
Press the seam allowance toward the top panel. Topstitch on the top panel 1/8'' from the seam.

Make the Zippered Pocket:
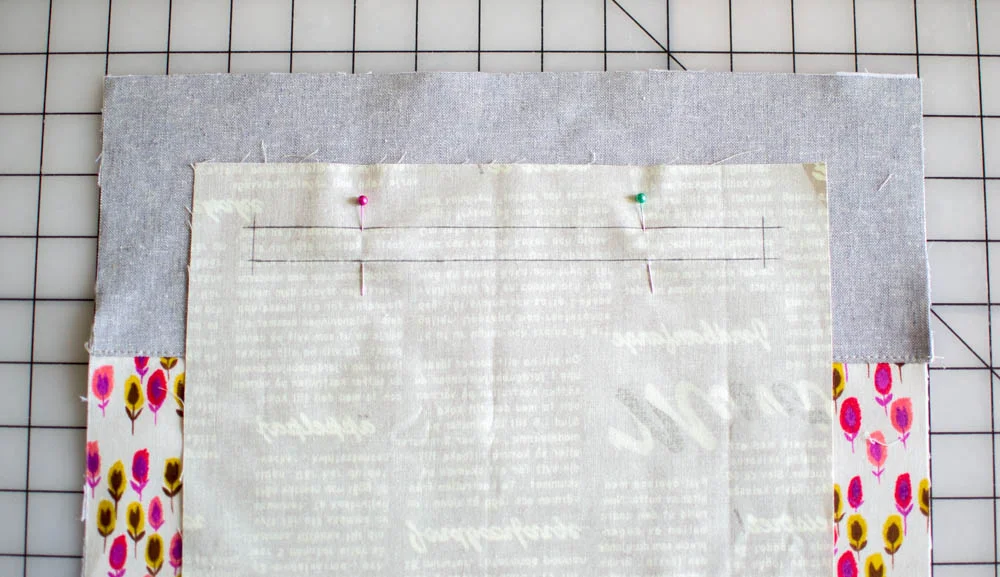
1. At the top of the zipper pocket rectangle (on the wrong side), draw a horizontal line about 8'' long 1'' below the top edge. Draw another line 1/2'' below it.
Then connect the two long lines with short vertical lines 1'' from each edge. You should have a long skinny rectangle 1/2'' tall and 8'' long.
2. Pin the pocket piece to one of the bag side pieces (either interior or exterior, where ever you want the zipper pocket) right sides together.
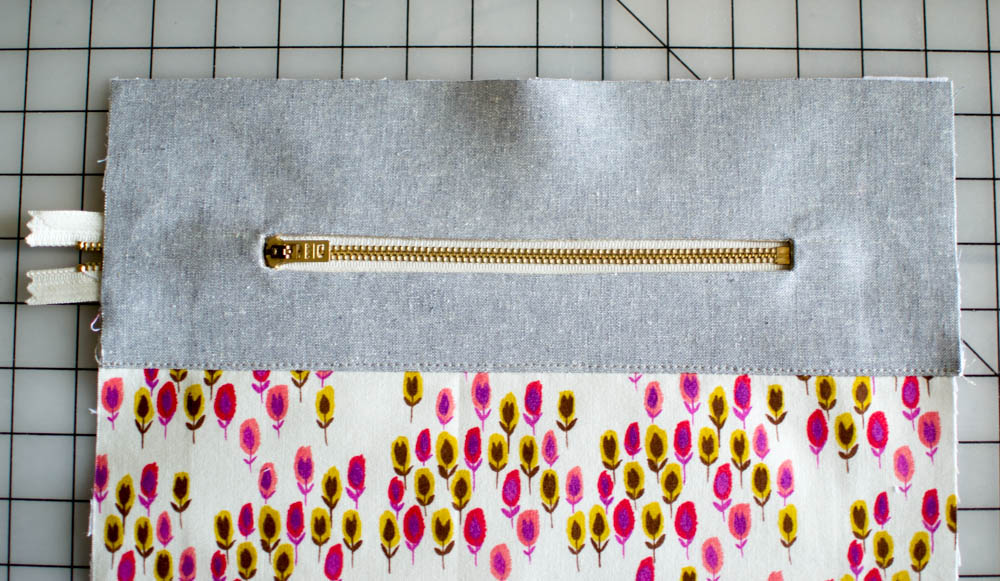
If you want the zipper pocket located where mine is (see the top picture in this post), place the top of the pocket piece 3/4'' from the top of the bag side piece. Place it 1 1/4'' below the top of the bag side piece if you would like your zipper pocket centered top to bottom on the upper panel.
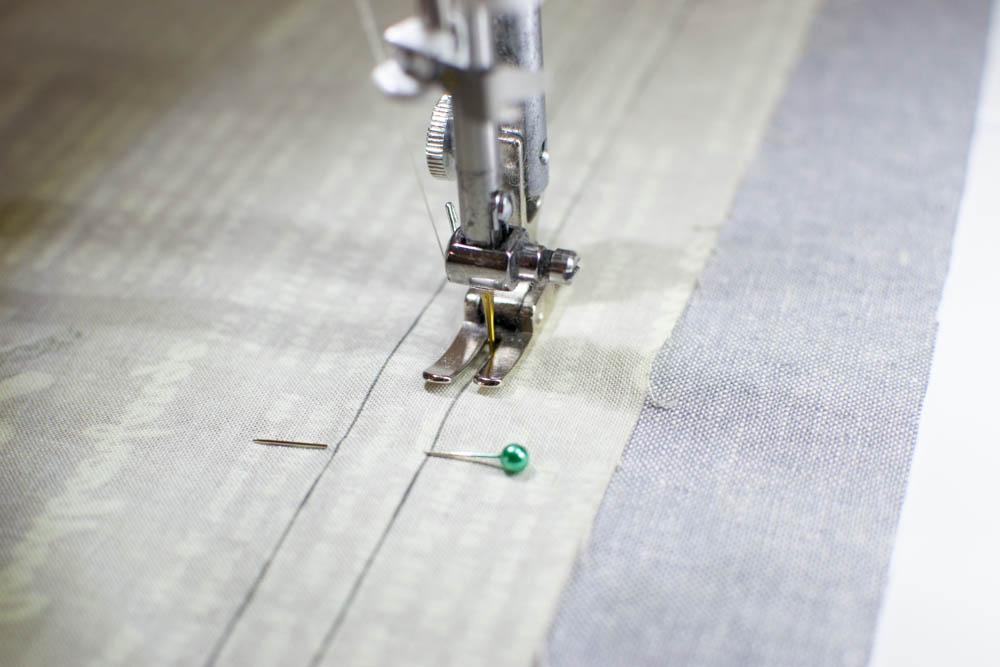
3. Sew all the way around the rectangle that you drew on the back of the zipper pocket rectangle. Backstitch at the starting point.
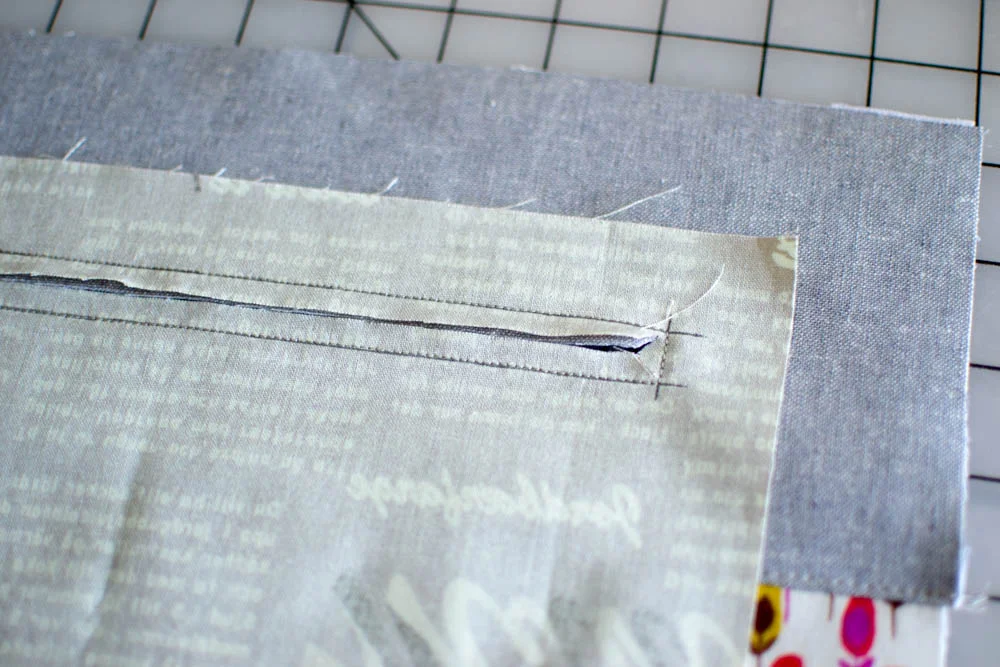
4. Using small sharp scissors, cut a line down the middle of the sewn rectangle, ending about 1/4'' from either edge. Clip to the corners. Be careful not to cut the stitching.

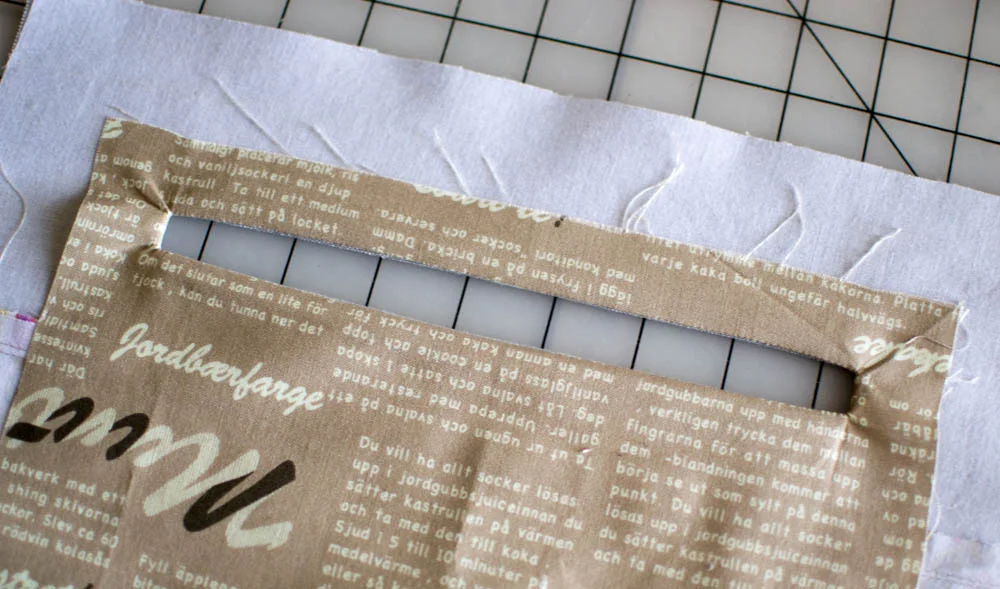
5. Turn the pocket piece through to the back of the bag exterior piece. Press gently from both sides.
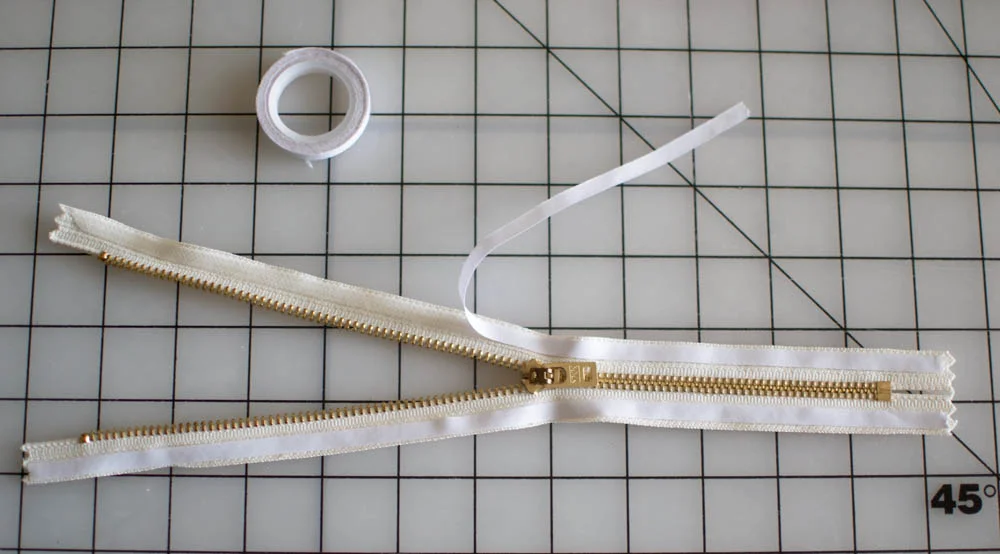
6. You could pin the zipper to the opening in the bag side, but I like to use a handy notion called Wondertape. It is like double sided tape for sewing. Apply Wondertape to both zipper tapes and remove the paper.
Center the zipper under the opening and press with your fingers to secure (or pin). Make sure the slider is visible in the opening. :)

7. Topstitch around the zipper opening, 1/8'' from the edge. If you are inserting a metal zipper like I did, see my Tips for Working with Metal Zippers.

Trim away the extra zipper tapes about 1/4'' from the sewing.
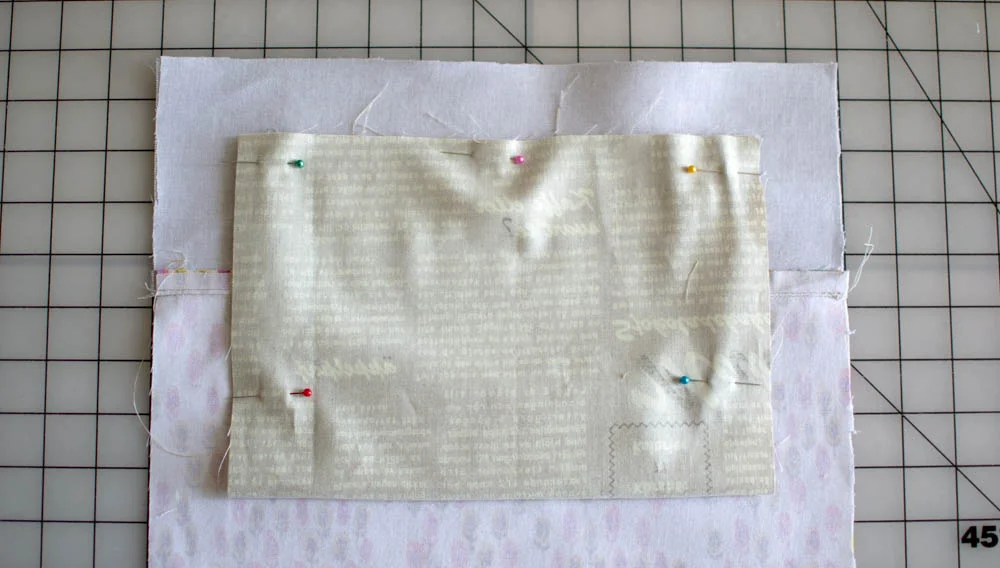
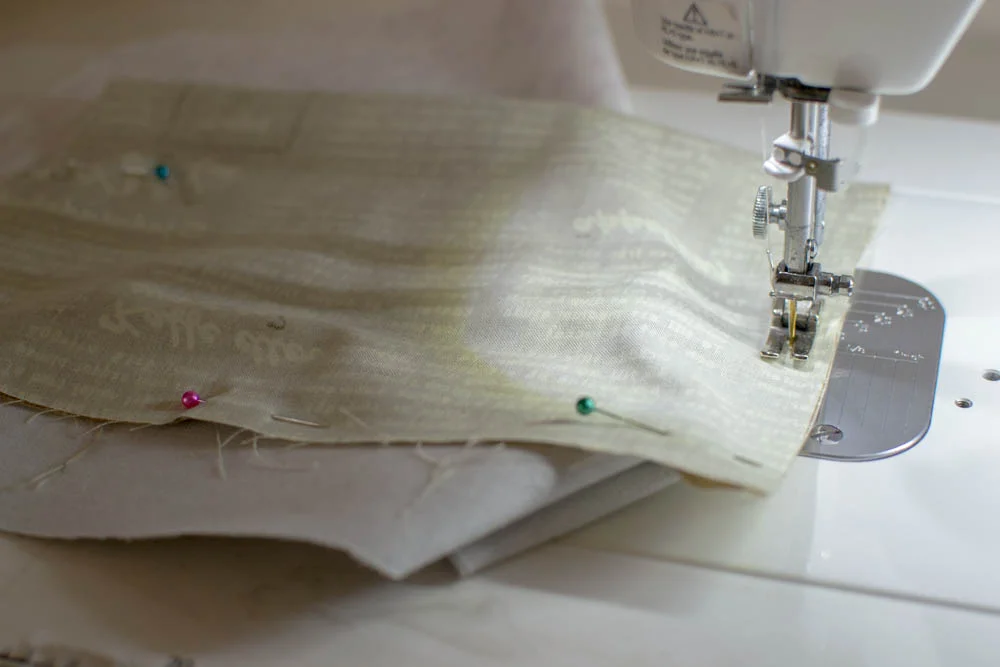
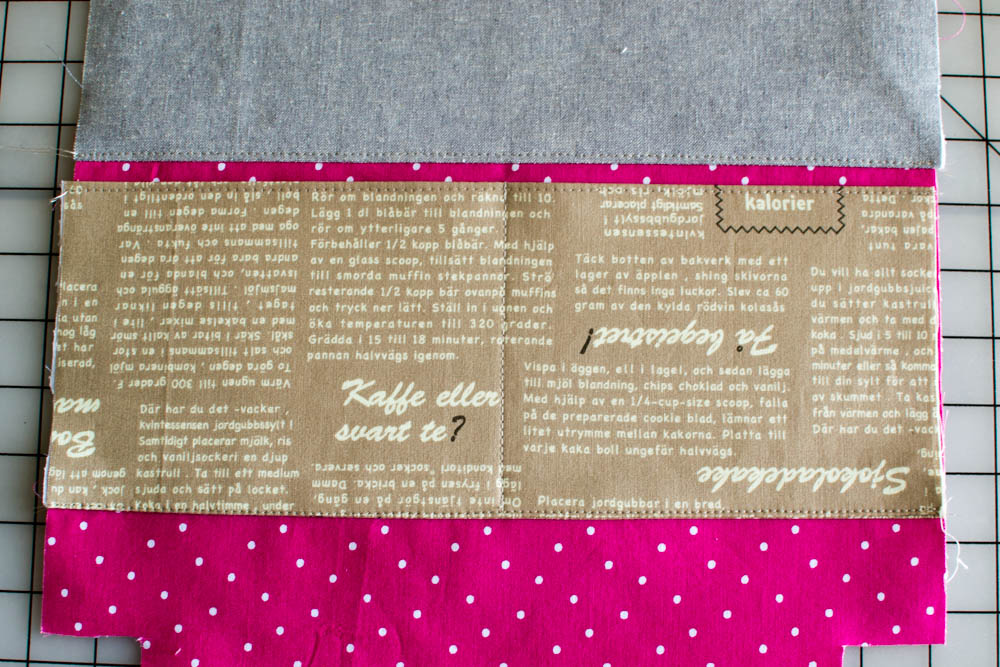
8. Fold up the pocket piece and pin around the top and sides.
Stitch the pocket top and sides with a 1/4'' or 1/2'' seam allowance.
Make the Slip Pocket:
1. Fold the slip pocket piece with the 13'' long edges right sides together. Sew along the top edge with a 1/2'' seam allowance.
Turn the pocket tube right side out and press.
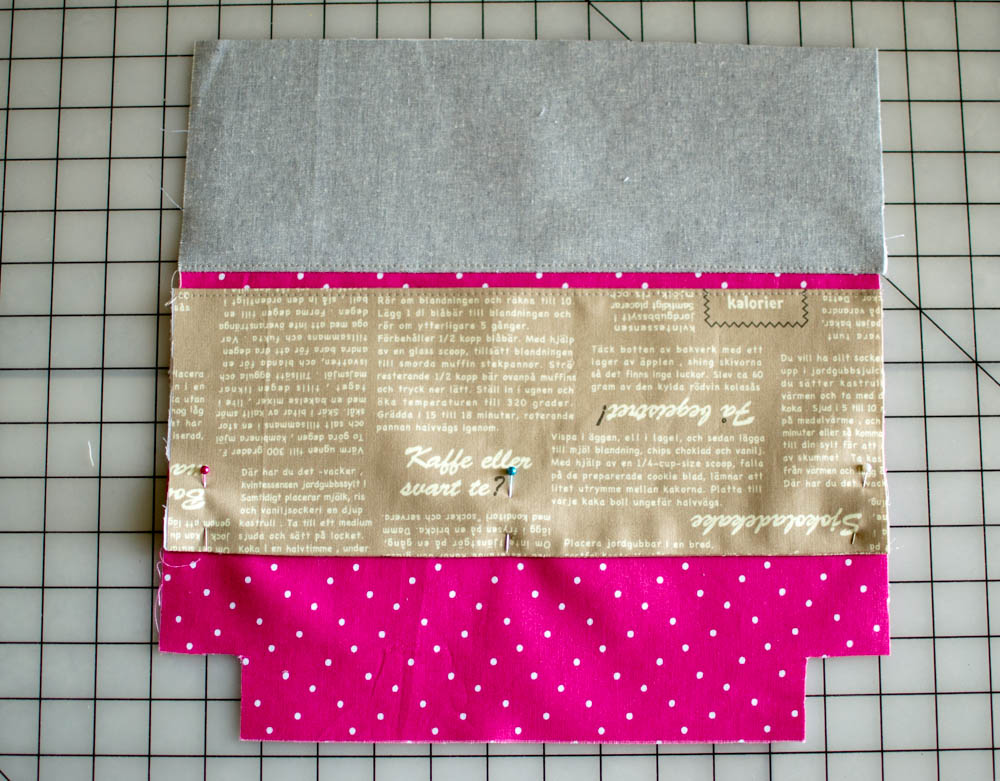

2. Place the pocket piece on top of a bag interior piece about 1/2'' below the upper panel.
Stitch close to the bottom edge to secure.
Baste along the sides within the 1/2'' seam allowance, if desired.
3. Mark and sew a dividing line to create two pockets.
Install the Magnetic Snap:
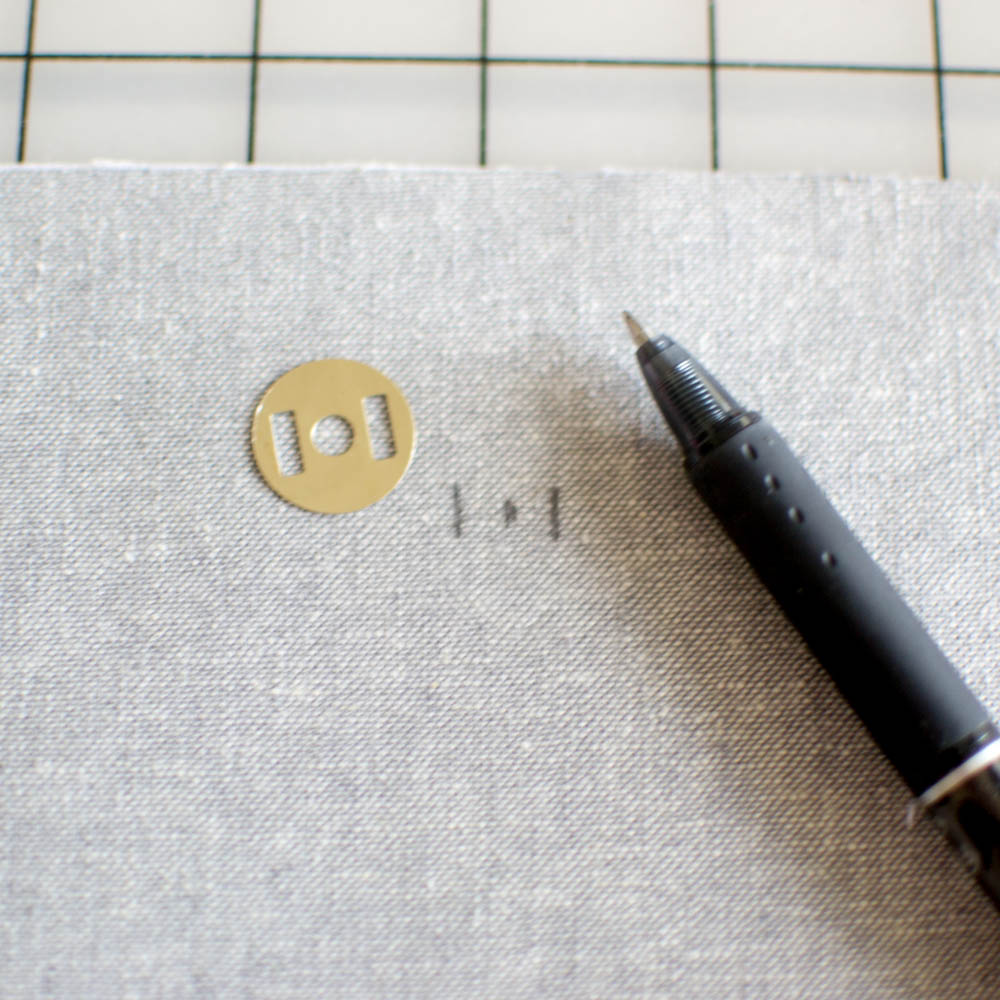
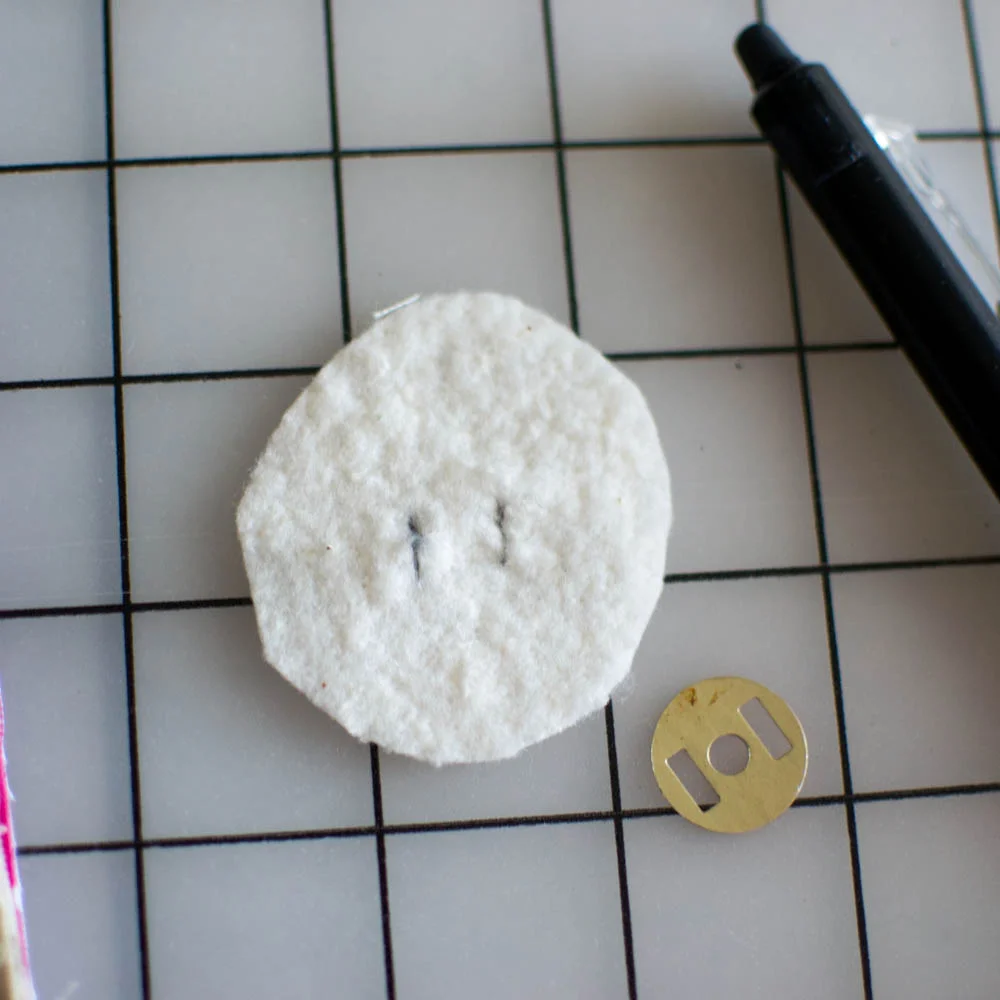
1. On an interior side piece, make a mark at the center of the upper panel 1 1/2'' from the top edge.Use the metal disk that came with the magnetic snap to mark the slit lines on either side of your center mark.
2, To stabilize the snap, cut two circles of quilt batting, fleece, or felt about the size of a silver dollar. Make slit marks on the stabilizer circles also.
Use a seam ripper or small scissors to cut small slits on all the slit marks.
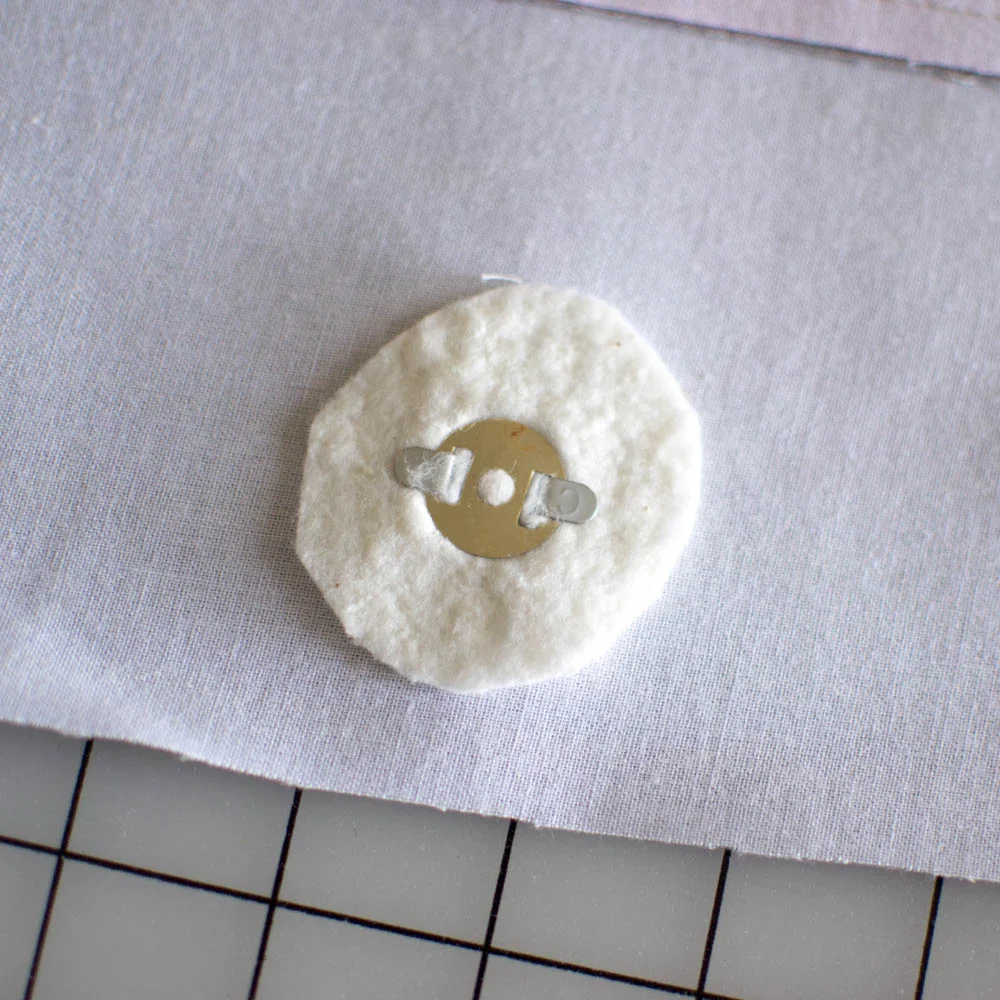
3. From the right side, insert the snap prongs through the slits. On the back side, place the stabilizer circle over the prongs, and then the metal disk. Bend the prongs outward.
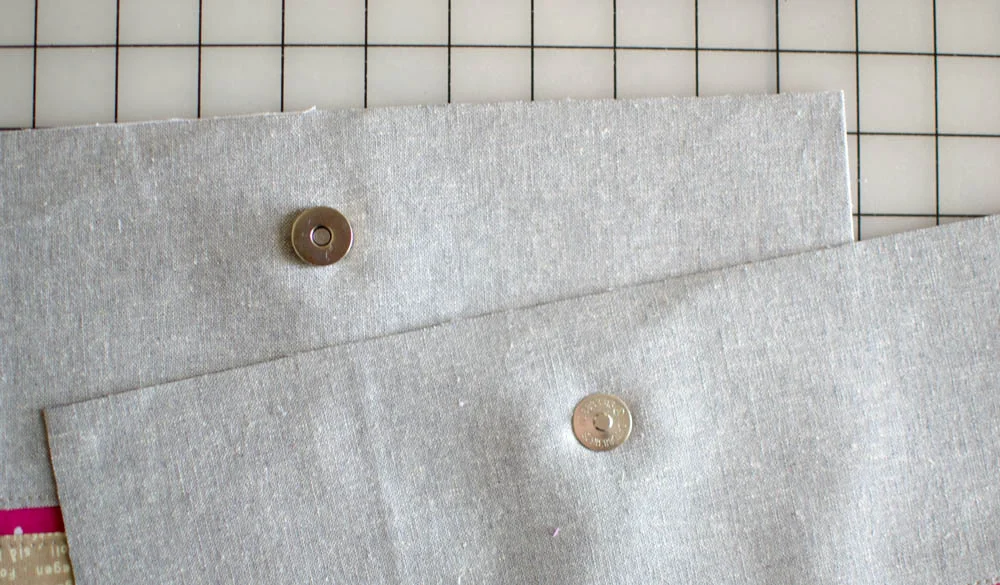
4. Insert the other half of the magnetic snap into the other lining piece in the same way.
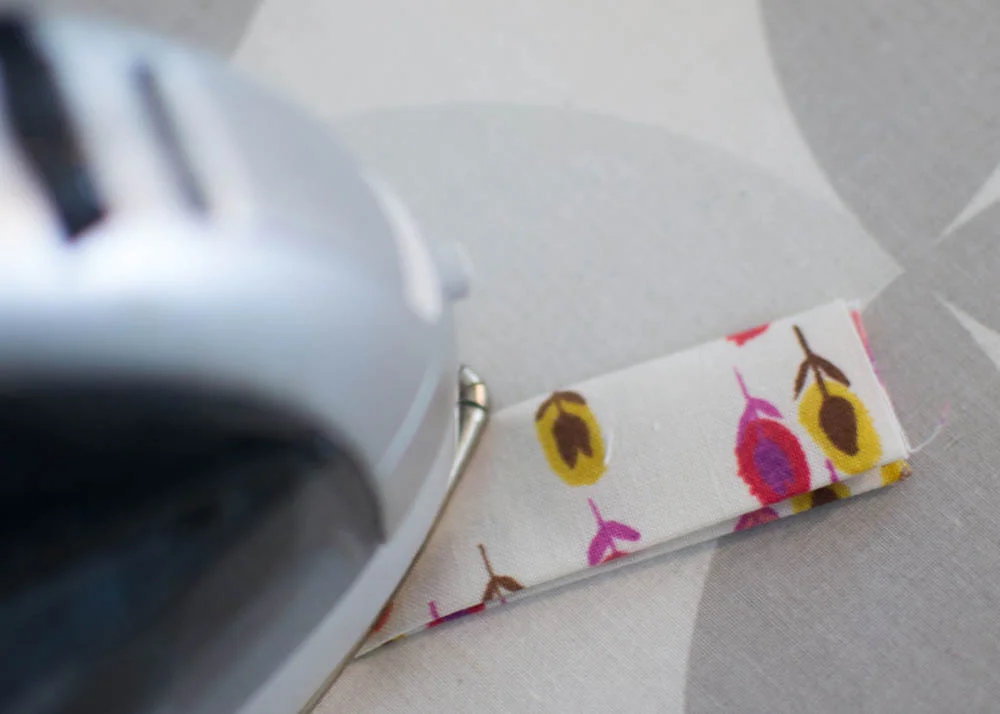
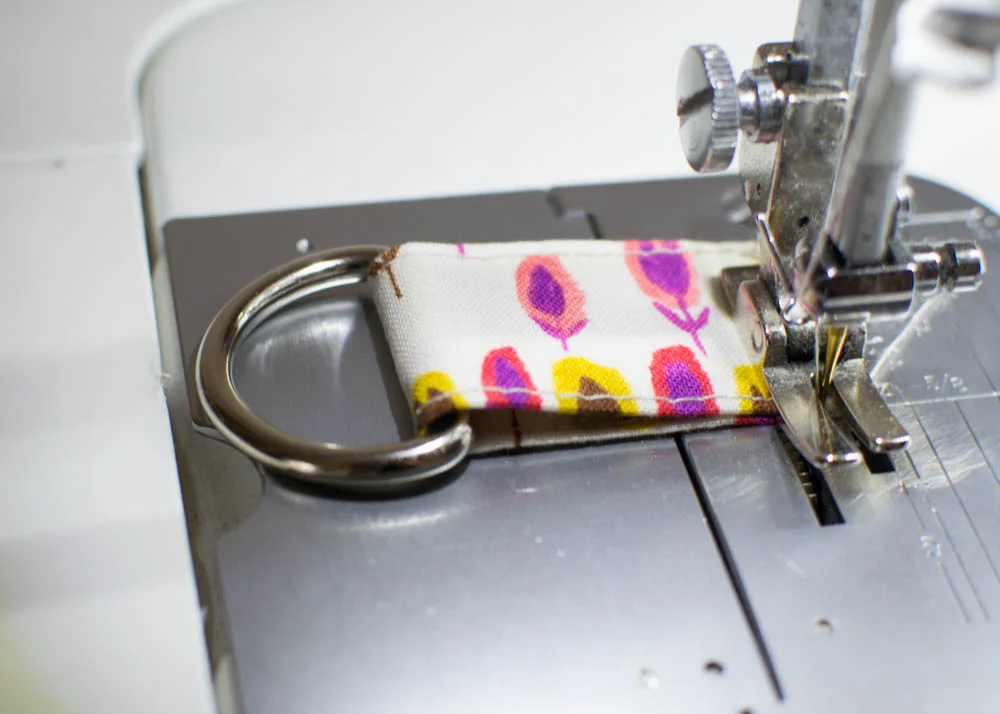
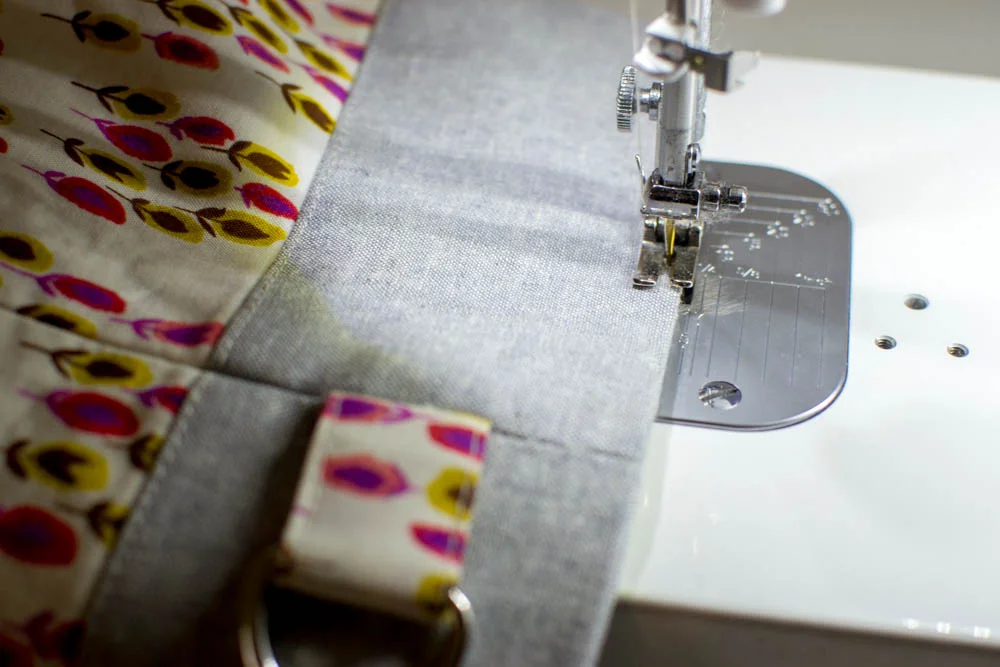
Make the D-ring Tabs:
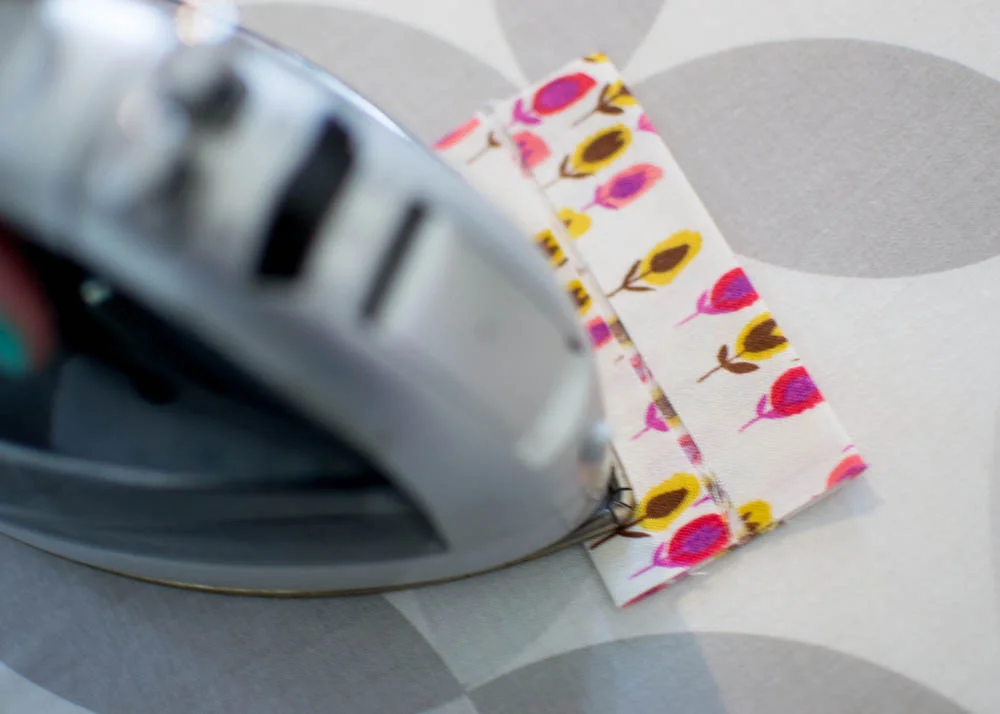
!. Press the tab pieces in half, and then press the edges to the center. Fold in half again and press.
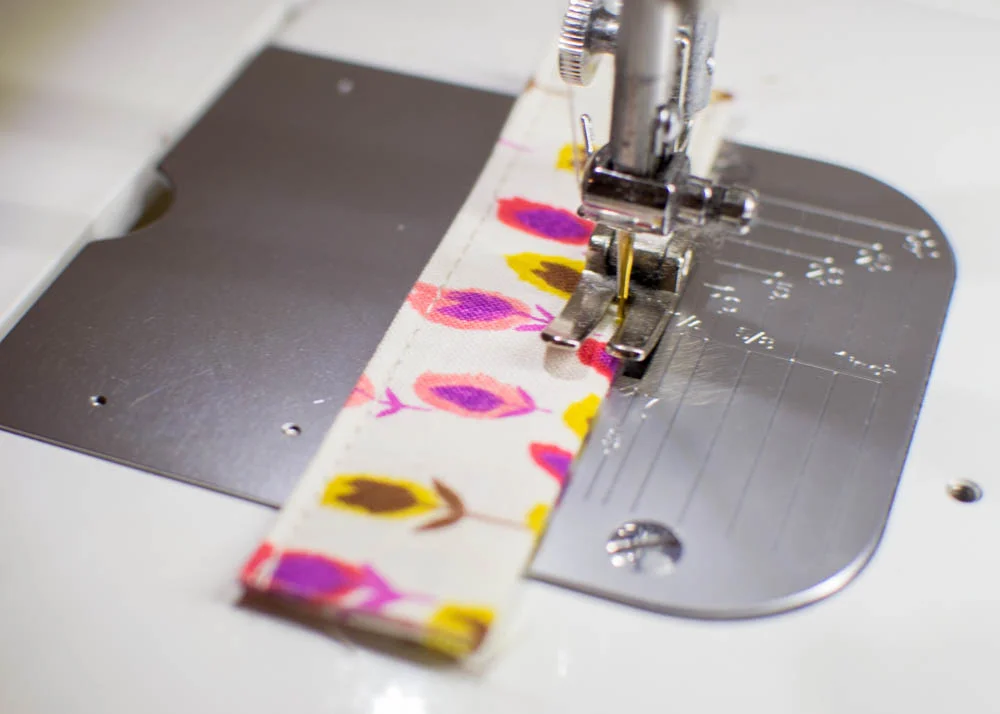
2. Topstitch close to the long edges.
3. Wrap each tap through a D-ring and stitch the ends together.

Make at least 2 D-ring tabs for the strap. Sew one more if you would like one on the interior.
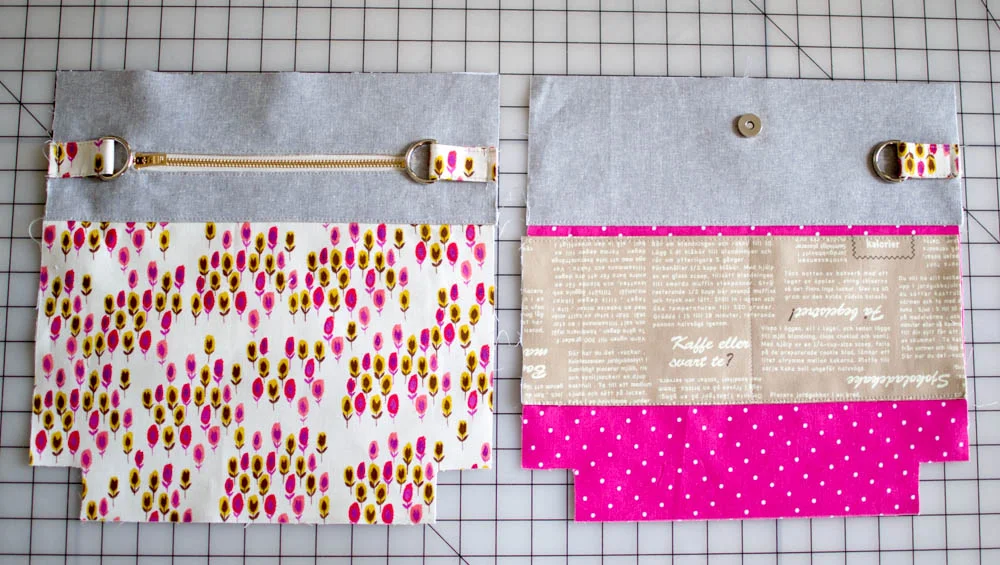
4. Center 2 D-ring tabs on the upper panel of one of the exterior pieces.
If you would like a D-ring on the interior of the bag, center one on the upper panel of a bag interior piece.

Sewing the Tote Together:
1. Pin the bag exterior pieces together along the side and bottom edges. Stitch with a 1/2'' seam allowance. Press the seams open.
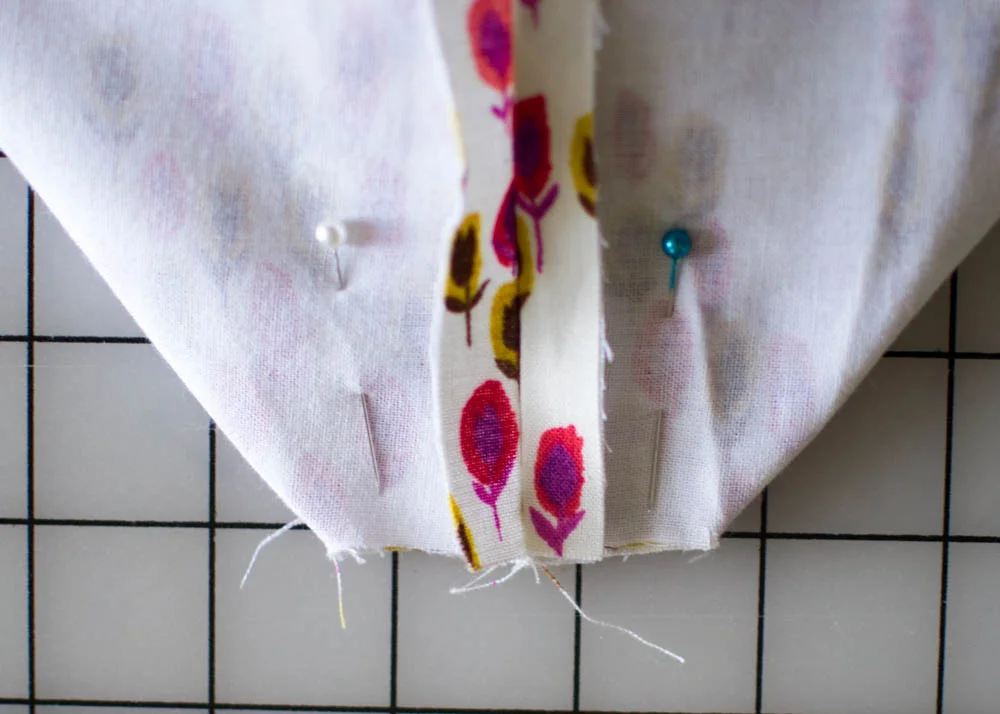
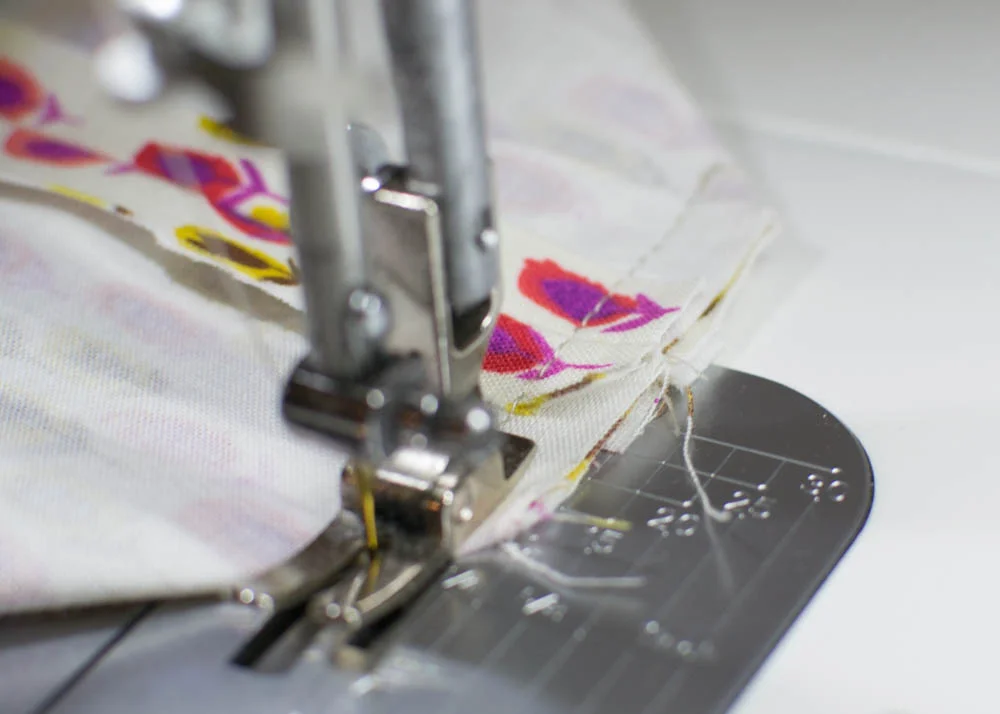
2. To box the corners, flatten each corner and center the side and bottom seams. Pin and stitch with a 1/2'' seam allowance. Sew both corners.
3. Sew the lining in the same manner as the bag exterior, except leave a 6'' opening in the bottom. Press the seams open and box the corners.

4. Turn the bag exterior right side out and place the bag lining over it so that right sides are together. Pin all around the top edge.

5. Sew around the top edge with a 1/2'' seam allowance.
Turn the bag right side out through the opening in the lining.
6. Pin and stitch the opening in the lining closed.
7. Press the bag and topstitch around the top edge.
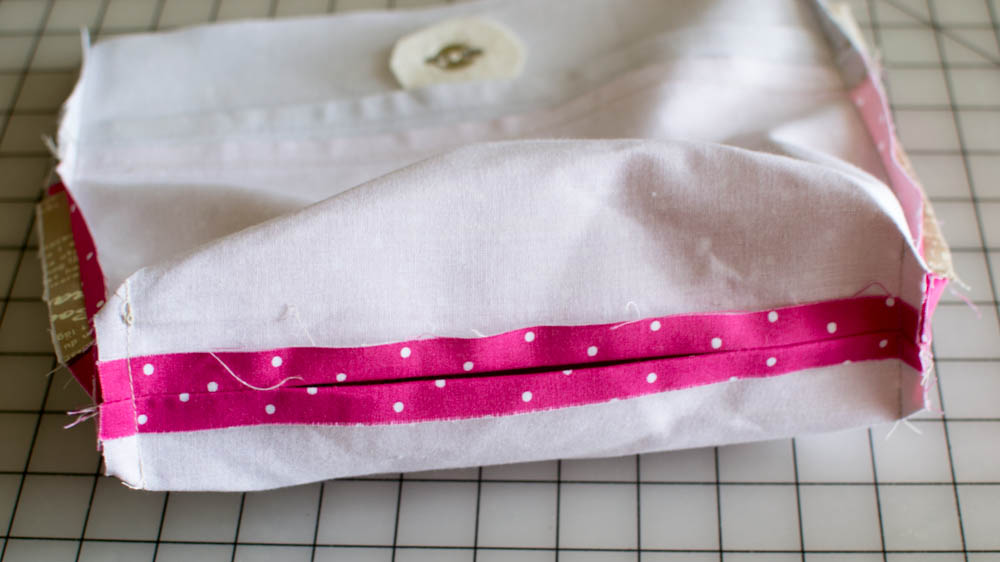
Sewing the Shoulder Strap:
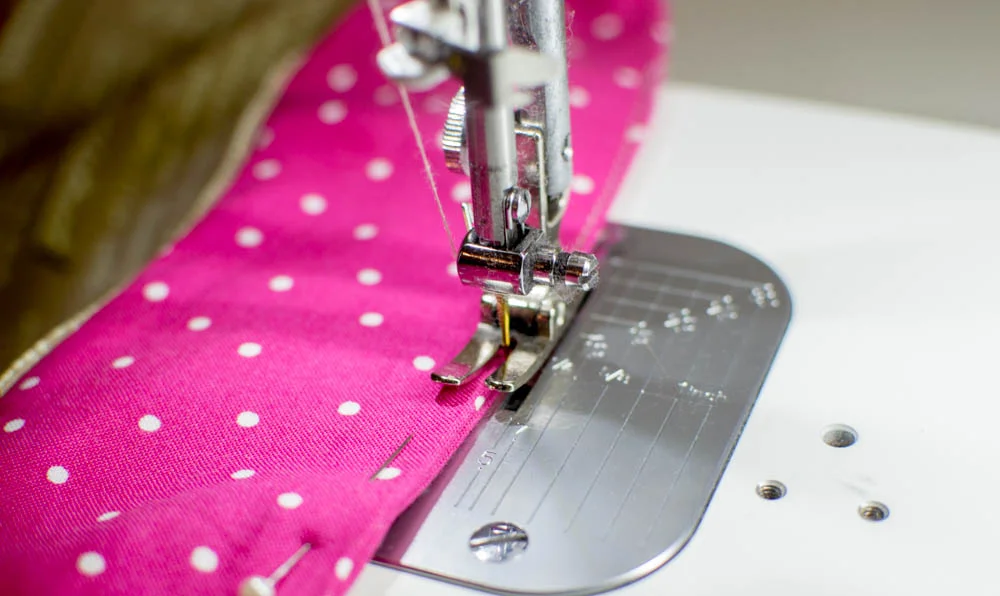
1. Press and topstitch the 4'' x 42'' strap piece the same way as the tab pieces.
For a permanent strap (not convertible), wrap each strap end through a D-ring on the bag exterior, tucking in the raw edges, and stitch to secure.
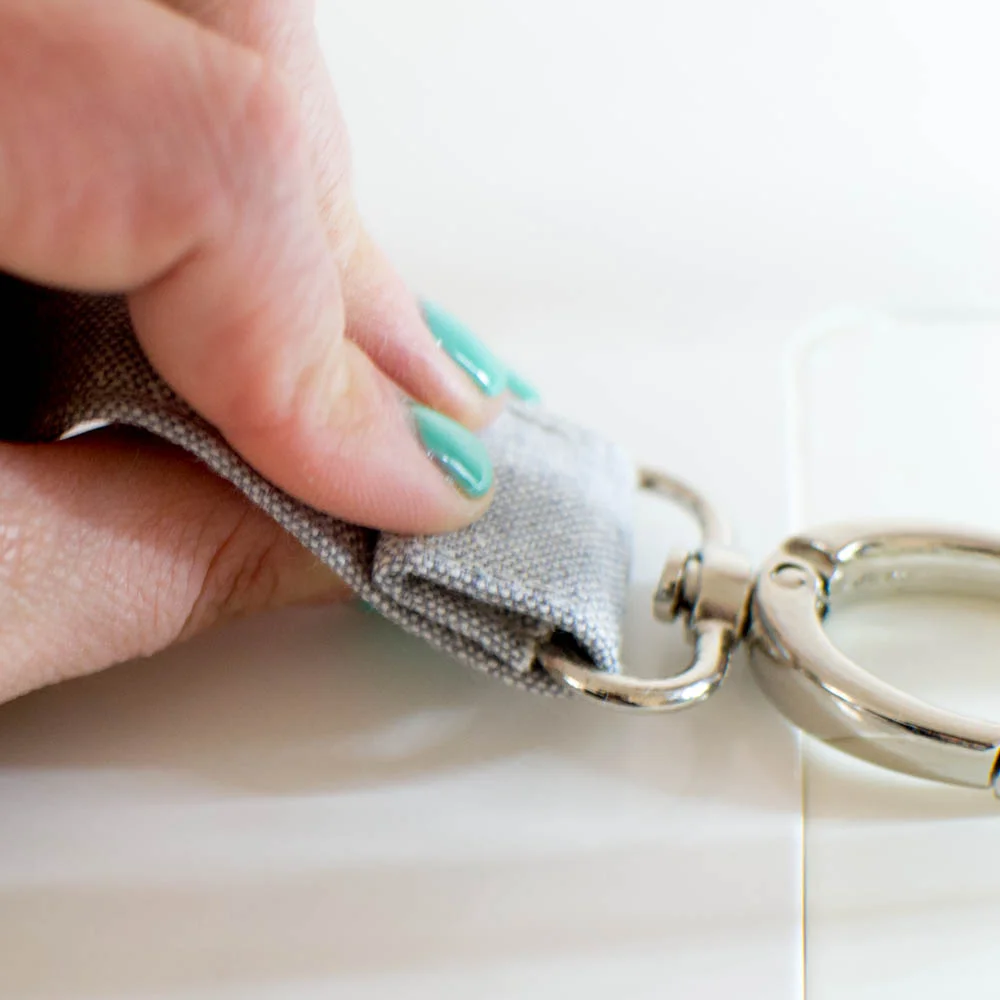
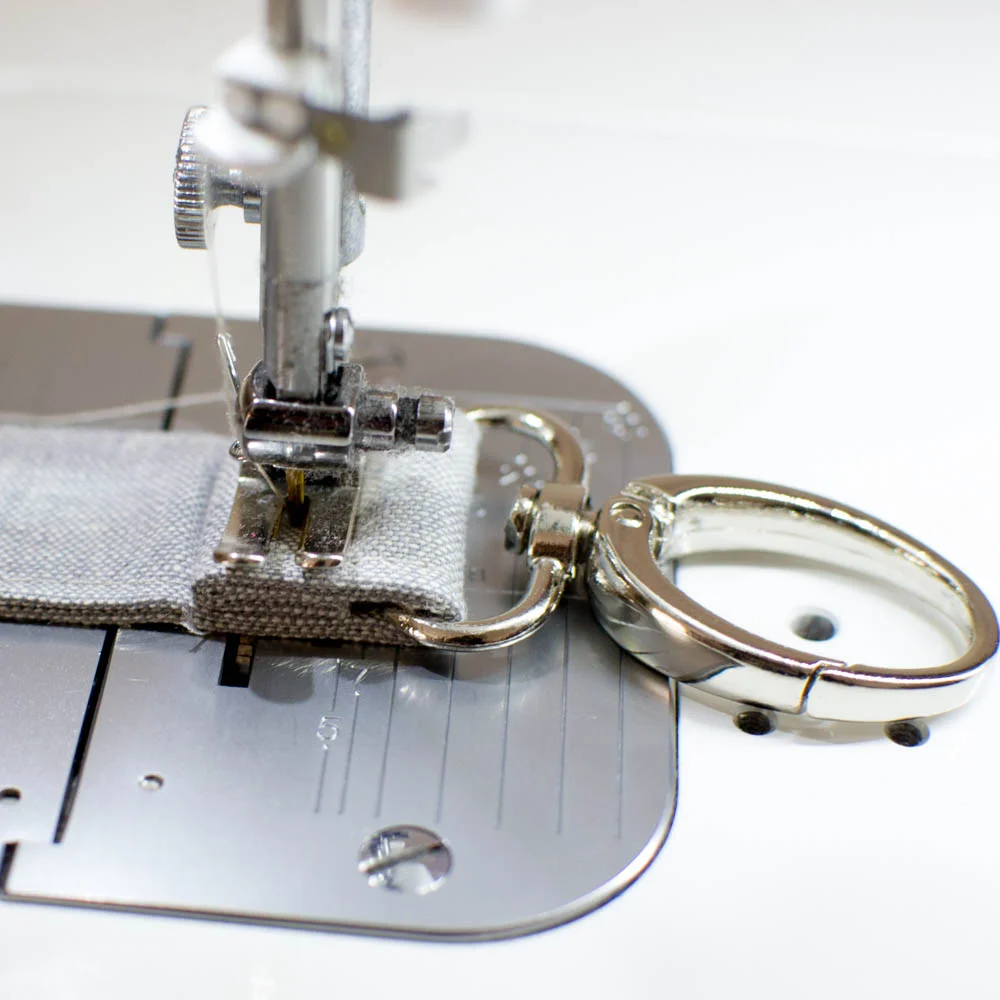
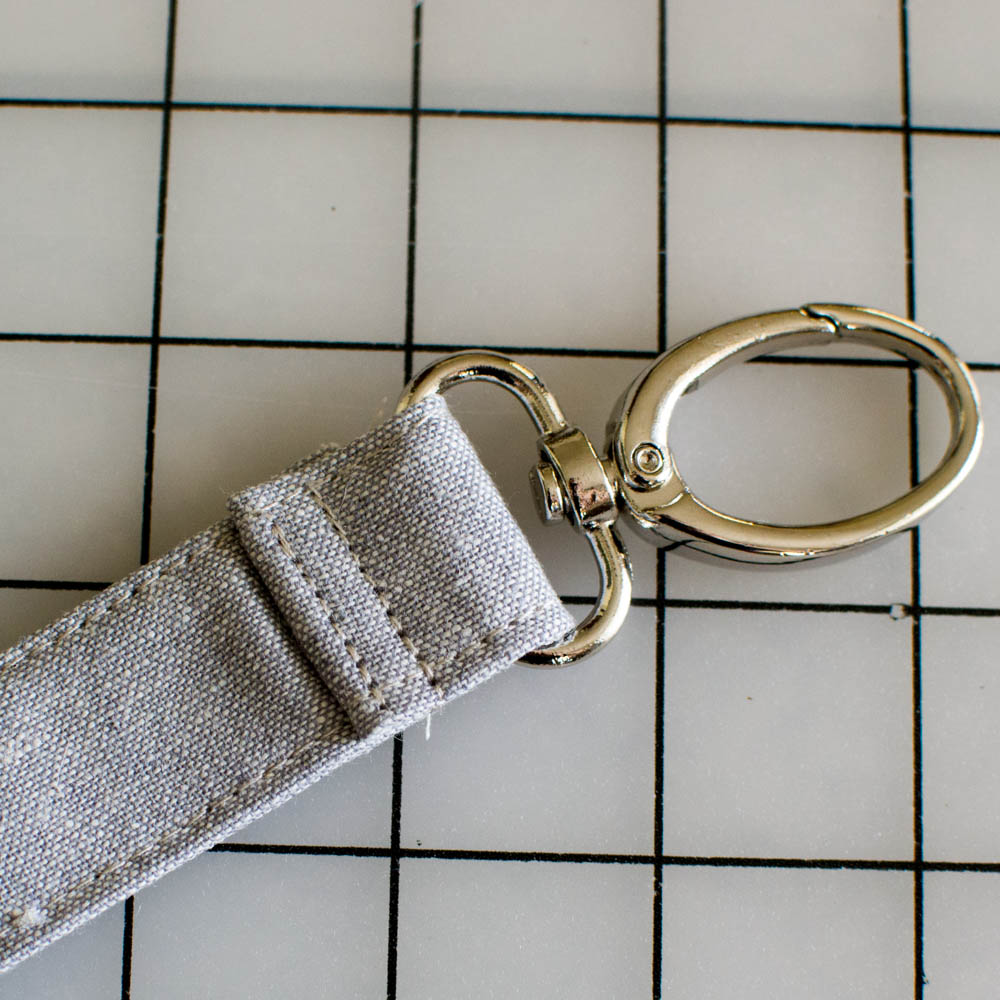
2. For a removable and convertible strap, sew swivel snap clips to the strap ends:
Wrap each end through a clip, tuck the raw edges under, and sew two rows of stitching to secure.
Tip: if it is hard to sew next to the swivel snap clip, try using your sewing machine's zipper foot to let you sew closer.

To make a cross-body strap, simply hook one clip on a D-ring on either side of the bag.
To make a purse-length strap, hook one clip on a D-ring, slip the other clip through the D-ring on the opposite side of the bag, and then snap it on the same side as the first clip.

Enjoy your new tote bag! And be sure to let me know what you think in the comments.
Happy sewing,
