

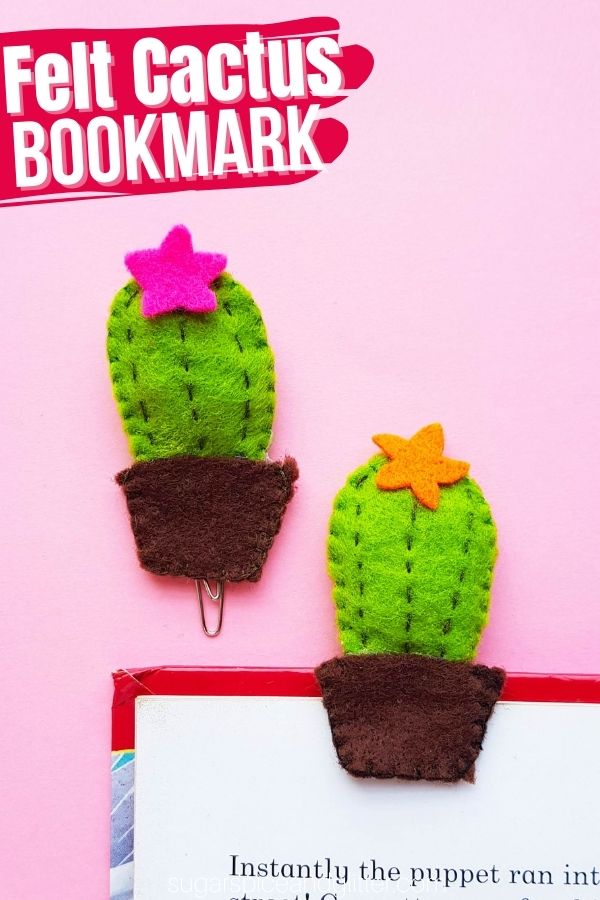
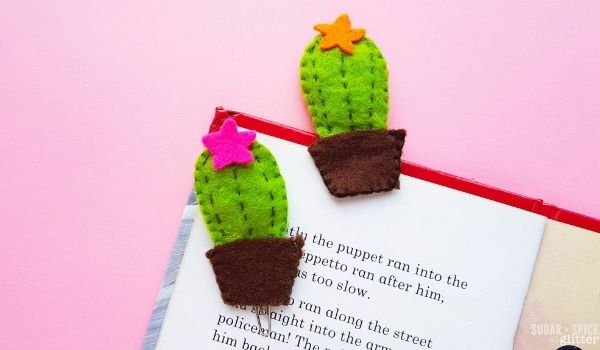
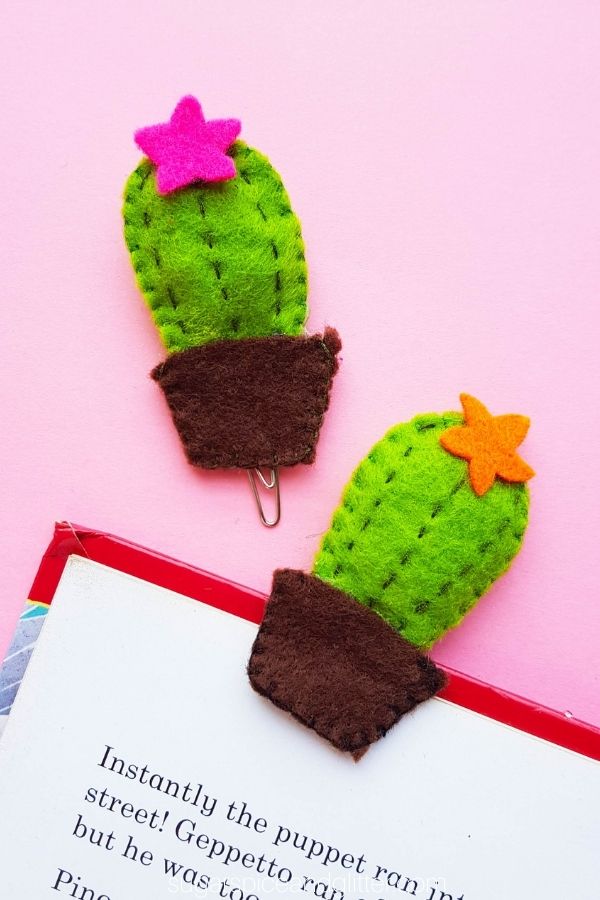
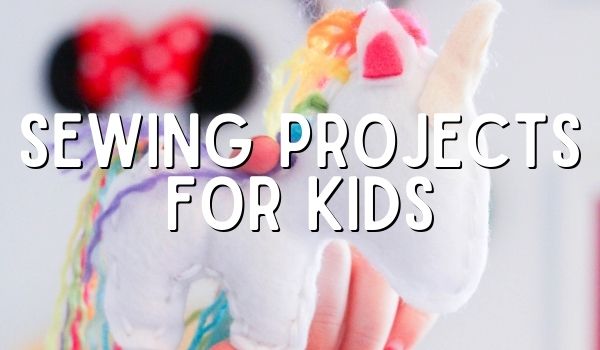
A quick and easy sewing project for kids, today’s Felt Cactus Bookmark is a cute craft that helps kids hone their sewing skills and results in a cute bookmark that they can actually use to save their spots in their most recent read.
DIY Cute Bookmark Craft for Kids
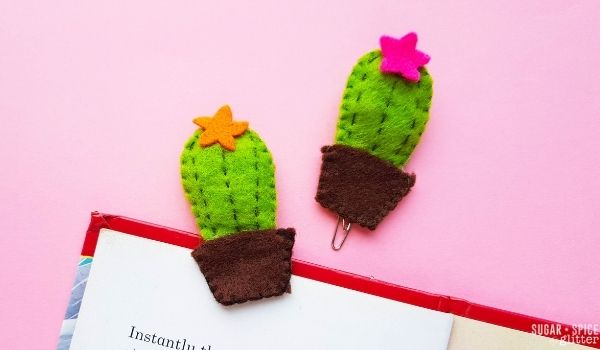
Ella couldn’t come on my last trip to Arizona, so I thought a fun Southwestern-inspired craft idea would be a fun idea for us to make together before I left. These cute little cactus bookmarks were perfect so I could take one with me and she could use one at home as we read The Little Princess over the phone together.
You could instead make these little cactus plushes into little pocket pals or add them to a different craft, like a hair clip.
The secret to making these paperclip bookmarks actually stay in place is to use the biggest paper clips you can find. We ended up swapping out the ones you see in the pictures for even bigger ones to help them stay sturdily in place. (There’s no point in using a bookmark that just falls out!)
This would be a great craft to make with a budding reader and would also make for a thoughtful homemade gift.
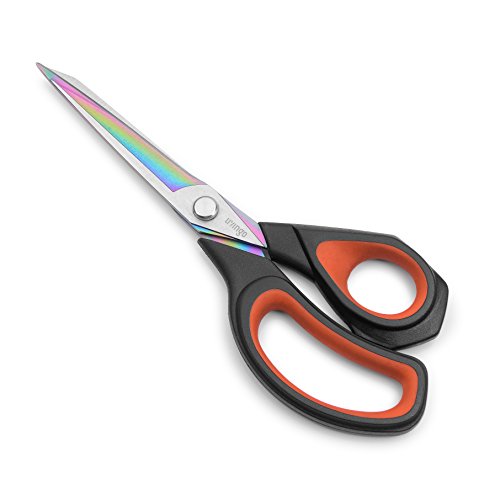
Whenever we need to cut out intricate shapes from felt, I always grab some freezer paper and use the freezer paper trick to cut out our felt shapes, but good-quality felt and a sharp pair of scissors also makes all the difference.
To make this DIY felt bookmark, you will need to use a flat blanket stitch and a running stitch. You can check out this youtube tutorial for how to do a blanket stitch and this youtube tutorial for how to do a running stitch.
More DIY Bookmarks for Kids
- Frida Kahlo Bookmark
- Bunny Corner Bookmark
- Printable Superhero Bookmarks
- Ladybug Corner Bookmark from Conservamom
- Heart Bookmarks from Fireflies and Mudpies
- Soap Shaving Bookmarks Craft from The OT Toolbox
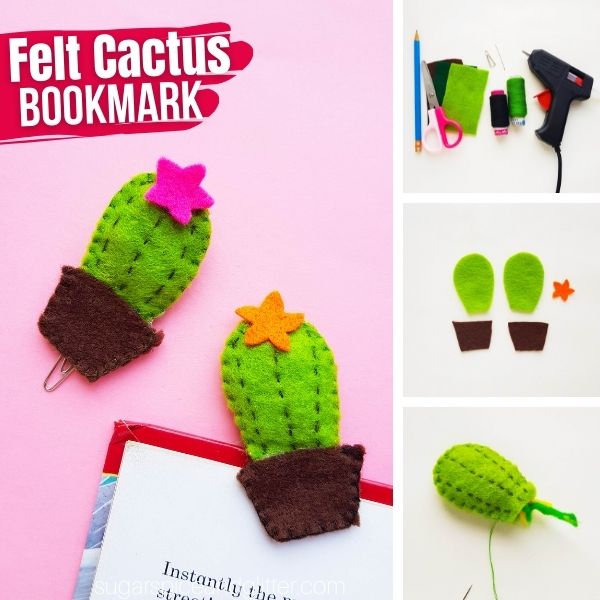
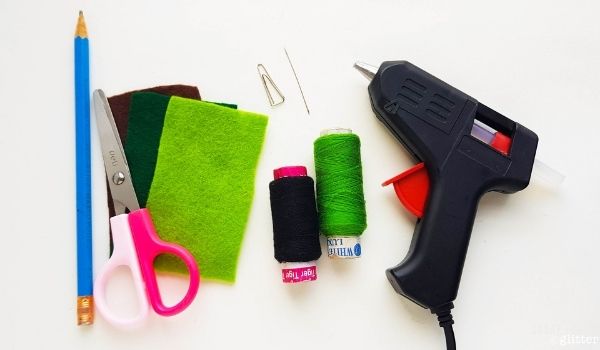
Materials to Make a DIY Cactus Bookmark
- Felt
- Pencil or fabric marker
- Scissors
- Freezer paper and iron (if using the freezer paper trick)
- Needle and Thread
- Hot Glue Gun
- Paper Clip
- Cactus Bookmark Template
Tip: buy the biggest paperclips you can find so that the bookmarks can stay sturdily in their places.
How to Make a Felt Cactus Bookmark
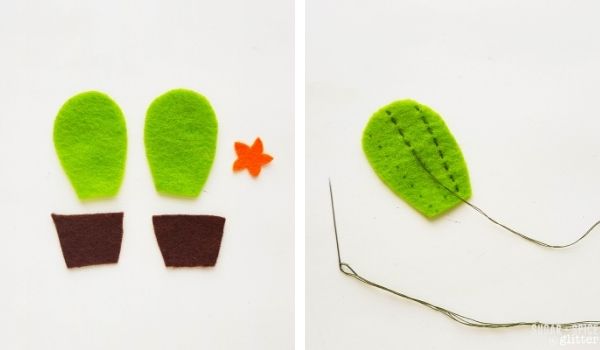
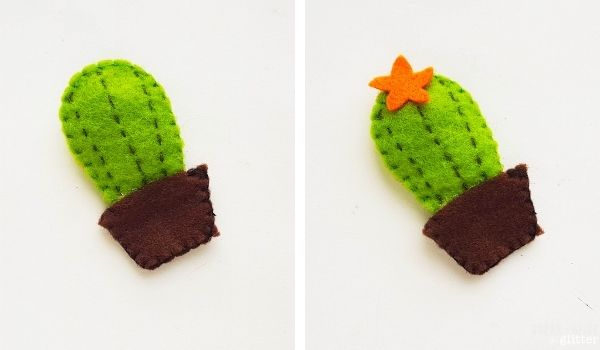
Select green colored felt for the cactus pattern, brown for the pot and any colored felt of your choice for the flowers. Trace the template patterns on the selected felt fabrics and cut them out nicely.
Grab any one of the cactus cutouts and prepare the needle with black thread.
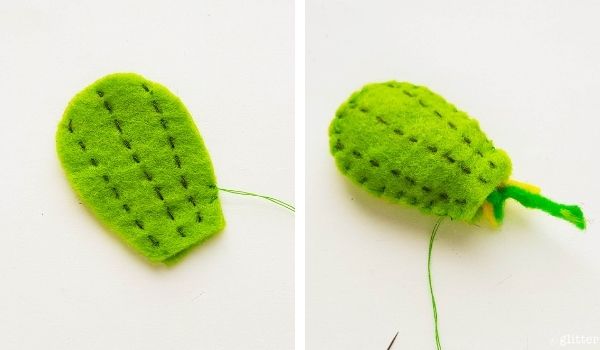
Stitch straight lines along the cactus cutout, vertically.
Work a simple running stitch along the lines.
We made 3 lines of running stitches on the cactus cutout. The stitched piece of the cactus cutout will be the front side of the cactus plushie.
You can either use cotton or scrap felt to fill the cactus felt pattern. Place the 2 cactus cutouts together and stitch around the sides and top. Keep the bottom end open.
Fill the felt cactus pattern with scrap felt through the bottom open end.
Place the 2 pot cutouts together and stitch along the 2 sides and the bottom side of the pot cutouts to join them together. Use a flat blanket stitch around the sides. Remember to keep the top end open.
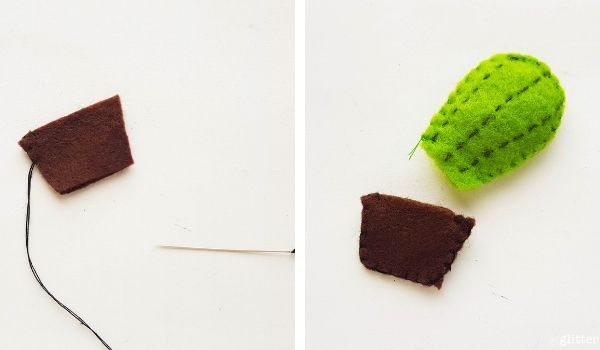
Fill the felt pot with scrap felt too if you wish to, or you can insert a small piece of cardboard to make it sturdy.
Insert the bottom end of the felt cactus pattern inside the top end of the felt pot pattern. Make sure that both patterns overlap each other by about a centimeter.
Apply hot glue to close the open ends and secure the pot around the bottom of the cactus. (Or, you can stitch them together, which ever you prefer.)
Stitch or glue the small flower cutout on the top-front side of the cactus plushie.

Attach a paper clip on the backside of the cactus pattern using a dab of glue. Use a small piece of felt to cover the top glued side of the paper clip and make sure to keep the bottom side of the paper clip intact, so that it can be used to clip papers.
Pin this Easy Cactus Bookmark craft for a fun sewing project for kids:

Grab your free printable instructions for our DIY Cactus Bookmark craft:
Cute Cactus Felt Bookmark DIY
How to make a felt cactus bookmark (or a felt cactus pocket pal, hair clip, etc) - a simple sewing project for kids that they can actually use after making, or give as a cute homemade gift!
Materials
- Felt
- Cactus Bookmark Template
- Paper Clip
Tools
- Pencil or fabric marker
- Scissors
- Freezer paper and iron (if using the freezer paper trick)
- Needle and Thread
- Hot Glue Gun
Instructions
- Select green colored felt for the cactus pattern, brown for the pot and any colored felt of your choice for the flowers. Trace the template patterns on the selected felt fabrics and cut them out nicely.
- Grab any one of the cactus cutouts and prepare the needle with black thread.
- Stitch straight lines along the cactus cutout, vertically.
- Work a simple running stitch along the lines.
- We made 3 lines of running stitches on the cactus cutout. The stitched piece of the cactus cutout will be the front side of the cactus plushie.
- You can either use cotton or scrap felt to fill the cactus felt pattern. Place the 2 cactus cutouts together and stitch around the sides and top. Keep the bottom end open.
- Fill the felt cactus pattern with scrap felt through the bottom open end.
- Place the 2 pot cutouts together and stitch along the 2 sides and the bottom side of the pot cutouts to join them together. Use a flat blanket stitch around the sides. Remember to keep the top end open.
- Fill the felt pot with scrap felt too if you wish to, or you can insert a small piece of cardboard to make it sturdy.
- Insert the bottom end of the felt cactus pattern inside the top end of the felt pot pattern. Make sure that both patterns overlap each other by about a centimeter.
- Apply hot glue to close the open ends and secure the pot around the bottom of the cactus. (Or, you can stitch them together, which ever you prefer.)
- Stitch or glue the small flower cutout on the top-front side of the cactus plushie.
- Attach a paper clip on the backside of the cactus pattern using a dab of glue. Use a small piece of felt to cover the top glued side of the paper clip and make sure to keep the bottom side of the paper clip intact, so that it can be used to clip papers.
Recommended Products
As an Amazon Associate and member of other affiliate programs, I earn from qualifying purchases.
-
 Large Eye Blunt Needles, 15 Pcs Stainless Steel Yarn Knitting Needles, Extra Large-Eye Yarn Sewing Needles, Knitting Darning Needles with Clear Bottle, Suitable for Crochet Projects, Silver
 -
 LIVINGO Premium Tailor Scissors Heavy Duty Multi-Purpose Titanium Coating Forged Stainless Steel Sewing Fabric Leather Dressmaking Softgrip Shears Professional Crafting (9.5 INCH)
 -
 flic-flac 44PCS 4 x 4 inches (10 x10cm) Assorted Color Felt Fabric Sheets Patchwork Sewing DIY Craft 1mm Thick
Pin this Project for Later
Please leave a comment on the blog or share a photo on Pinterest
This DIY Bookmark craft is a fun sewing project for kids and then they can use their creation every day with pride in their handiwork.
For more kids’ craft ideas, check out our full collection here:
For some sewing projects for kids, check out our kids’ sewing project ideas here:
For more summer-inspired crafts, check out our full Summer craft collection here:

The post Cute Cactus Felt Bookmark DIY appeared first on Sugar, Spice and Glitter.