

Before going to the office or an important meeting, you will definitely want a quick shower. Again, when you will return home after a tiresome day, you would not like those drizzles falling from your shower which hardly touches your body. If the water pressure of your shower is too weak, you can remove the flow restrictor to get a stronger flow.
You can also get weak water flow because of the setting of your shower head or the low water pressure of your area. But in most cases, by removing the restrictor valve you will get a better result.
In the US, according to federal law, shower heads are required to have a restrictor valve to be sold. There is more than one reason behind it-to save water during shower as safe water sources are limited, save cost after water and energy bills, etc.
But the owner can decide whether he will remove the restrictor or not after buying the product. By removing it, you will discover a stronger water flow as water flow will be totally unrestricted without it.
Before going in deep you also like to read
Best delta shower head
Best filtered shower head
Best rain shower head
Best low flow shower head
What is Flow Restrictor?
A flow restrictor is a small device used to control and limit the amount of the water that flows through your shower head per minute. It is added with a showerhead as per the requirement of US law (keeping the maximum flow rate 2.5 gallons per minute) to conserve water. This valve allows us to go some water through it, it restricts the maximum amount of water.
To conserve water after removing the restrictor valve your showerhead should have different water settings including a pause setting which will help you to reduce the flow to a very slow spray and conserve water during the time you do not need high water flow when you shave, soap yourself or scrub your body.
How to Remove Flow Restrictor from a Delta Shower Head
You will need a paper clip or a needle nose plier, a wrench and some white Teflon tape for removing the restrictor valve. You may need a screwdriver if the valve is firmly attached to the head.
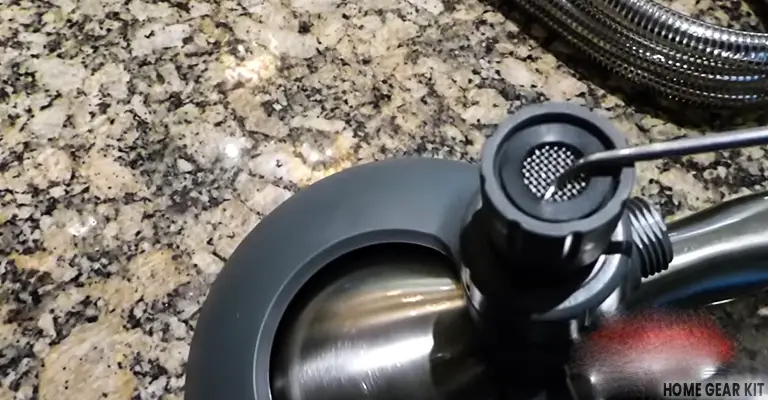
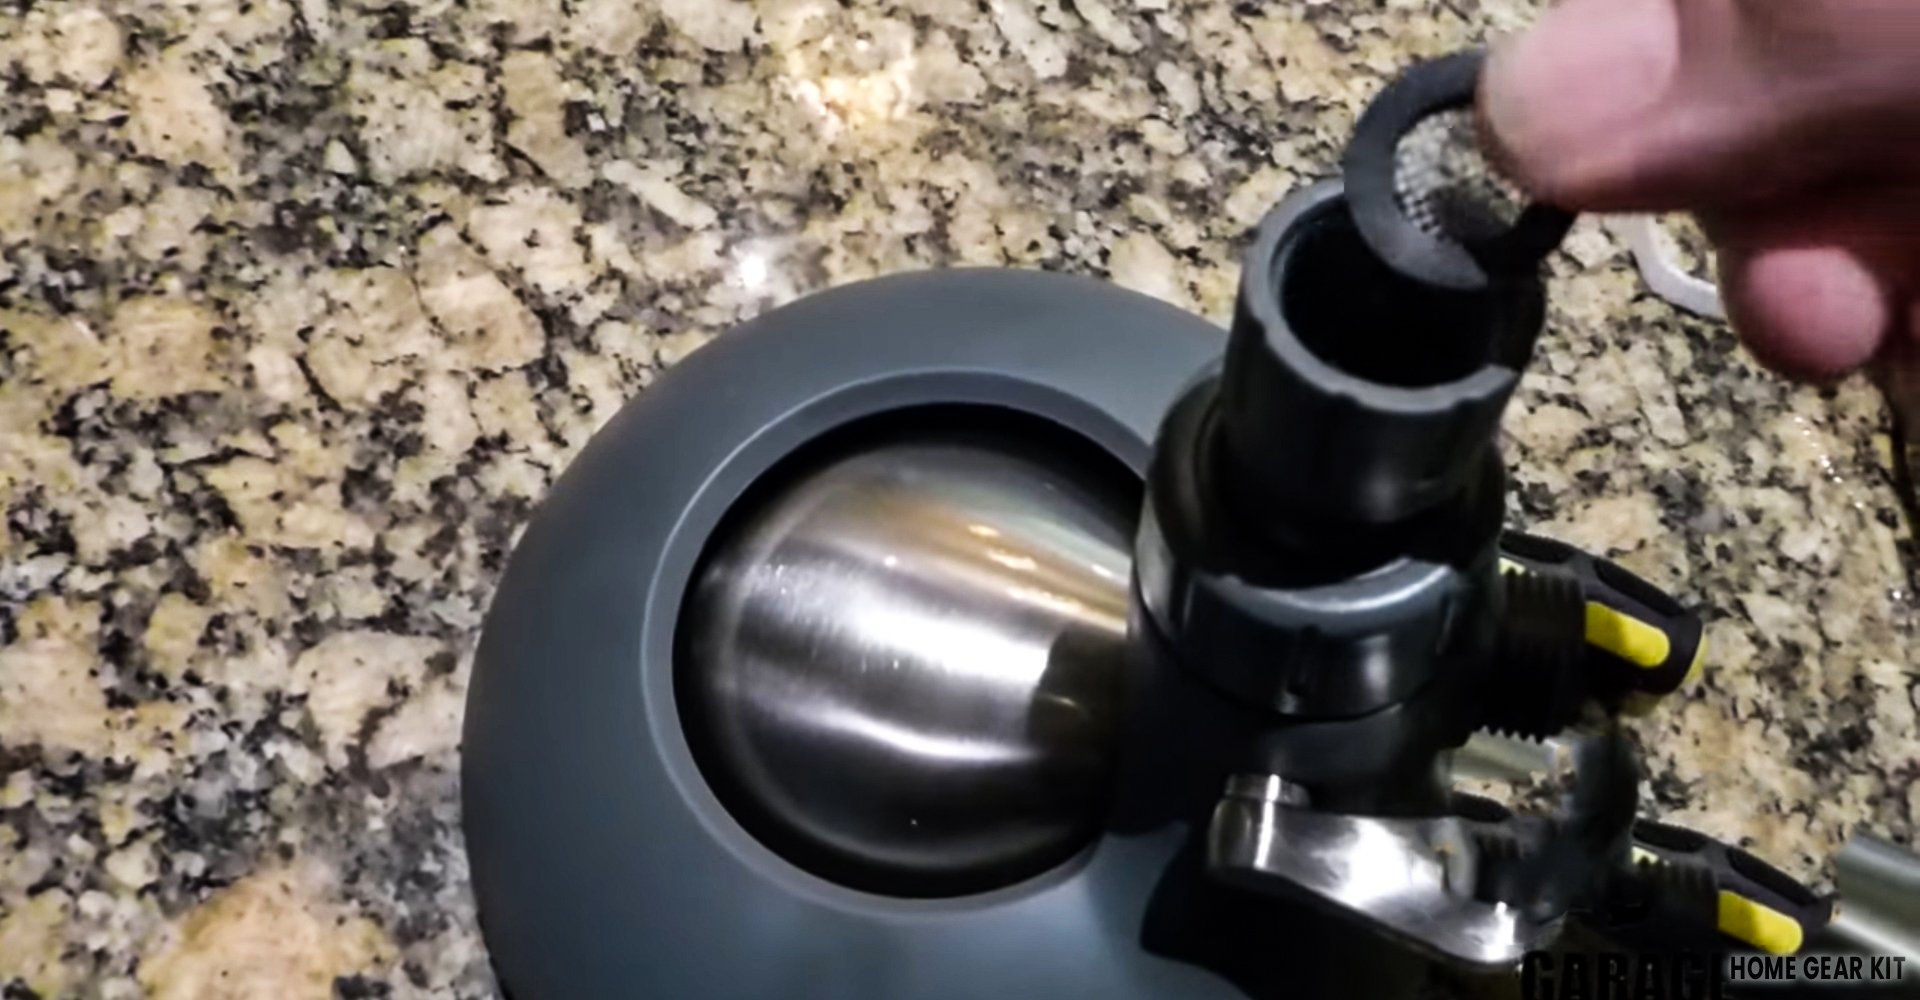
Disconnect the Head from the Wall Pipe
The restrictor valve is built into the showerhead assembly. It is placed inside the part of your shower head which is attached to the pipe. At first, you have to disconnect the head from the wall pipe (shower arm). Remove it by twisting it with a wrench and loosening it up.
Sometimes, your shower is placed on a swiveling ball joint. In that case, loosen it with the wrench. At that time, you should put a cloth or a rag around the shower arm and nut to avoid any scratch on the metal or plastic.
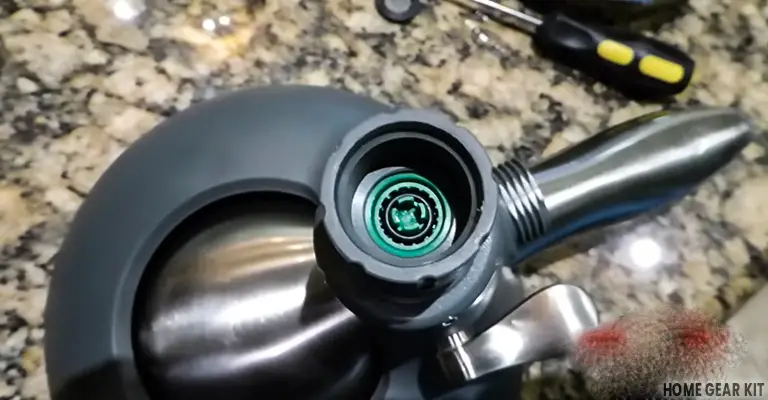
Remove the O- Ring and the Screen
After removing the shower head from the arm, you can see the inner portion of it. There you can see an O-ring which is the washer of the shower head that firmly holds the filter screen.

Now you have to remove the screen with the o-ring to reach the flow restrictor.Poke the O-ring with a paper clip or a needle nose piler and take it out. The screen should come out in this way. Do it very carefully because you will need them while reassembling the shower head. Keep it aside.
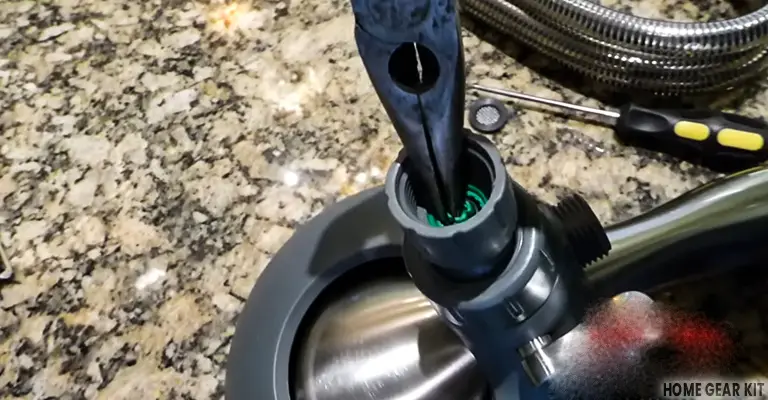
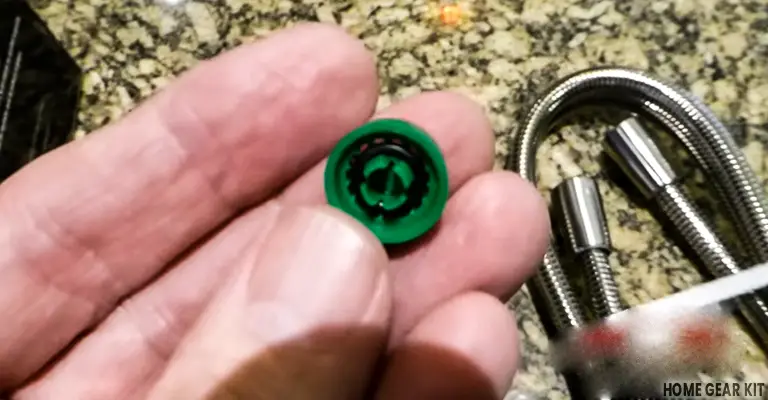
Remove the Restrictor Valve
Now you will see a green/purple color tiny thing. The color may vary depending on the models of the shower head. This tiny object is the restrictor valve, which can restrict the huge amount of water from flowing through your shower head! There are four tabs in the center and a few holes surrounding them. Grab one of the tabs and take it out with your needle nose piler or any pokey tool.
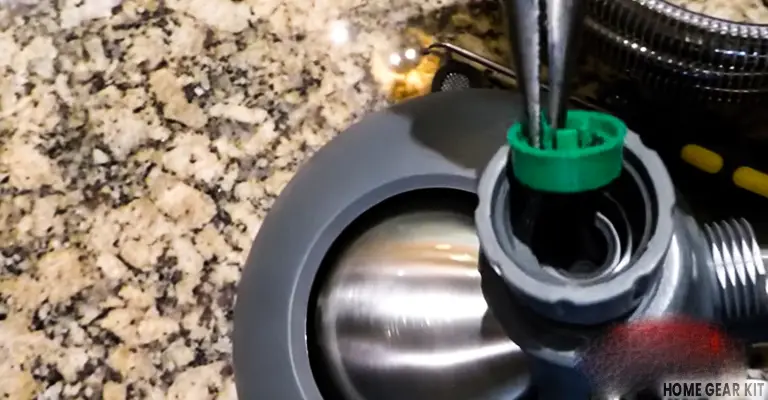
If you can not succeed with your piler, you can use a screwdriver too if it is attached tightly. It will definitely help you but, using a screwdriver will cause a little mess there.
So, the little culprit is now out of the way. Your shower head will now supply you ample water.
Reassemble the Shower Head
When you have removed the restrictor valve, put the washer and screen filter back in its place.
Press it firmly to set it in place.
Take off the old Teflon tape from the shower arm and put there some white Teflon tape to avoid any scratch on the body of the shower head or shower arm. Place the shower head and the nut in its place. With the wrench fasten the nut to firmly fix the shower head in its place. Now, you are done with it.
Even you can put it back in its place after removing it if you again need to do that. So, you should store that restrictor safely.
The removal of flow restrictor is recommended for the adjustable shower head so you can opt for the lowest water spray option when you do not need water during the shower at the time of scrubbing or shaving. Now your shower head will flow water with a better speed.
The post How to Remove Flow Restrictor From Shower Head appeared first on Home Gear Kit.